As of WordPress 5.0’s release on December 6, 2018, WordPress has a new default content editor. Called the WordPress Gutenberg editor while in development, “Gutenberg” is now just the “WordPress editor” or “block editor” if you want to be more specific.
The block editor brings with it a completely different approach to content creation in the form of blocks (hence the name…). And in this post, you’re going to learn exactly how to make a WordPress website using those blocks, and the editor’s other features to create content on your site.
We’ll start by showing you how you can use the block editor to create content for your posts and pages. Then, we’ll give you a look at how the block editor goes beyond just posts and pages and into “full-site editing”. With these full-site editing features, you can use blocks to control your widget areas, design theme templates, and more.
Let’s check it out!
What is Gutenberg?
Gutenberg is the project name for the WordPress block editor, which replaced the WordPress TinyMCE editor as the default WordPress editor in WordPress 5.0.
While Gutenberg was the official name while the editor was under development, it’s now just “the WordPress block editor” or “the WordPress editor” because it’s officially part of the core software. As such, you’ll often see me refer to it as the “block editor” in this post, rather than “Gutenberg”.
As a quick refresher, here’s what the old WordPress TinyMCE editor looked like. This editor is now called the classic editor:

And here’s what things look like in the WordPress block editor, AKA Gutenberg:

It’s more than an aesthetic update, though. Gutenberg completely changes the editing experience by moving to a block-based approach to content (more on exactly what blocks are in a second!).
While the current focus is on content creation, the eventual goal is to have the Gutenberg block editor “go beyond the post into page templates and ultimately, full site customization.” The official name for this change is full-site editing.
That means that, somewhere in the near future, you’ll be able to build your whole site using blocks, including landing pages and other important content. Some of these new full-site editing features have even made it into the core WordPress software as of WordPress 5.8 – we’ll cover these near the end of this post.
Is Gutenberg a part of WordPress?
Gutenberg was officially released as part of WordPress 5.0 on December 6, 2018. If you’ve updated your site to WordPress 5.0, you should now see the block editor by default.
However, because of the magnitude of the release, some managed WordPress hosts have opted not to update peoples’ sites right away. For that reason, there’s a chance your site might not be running WordPress 5.0 yet. In that case, it’s up to you whether you want to update or not (though you shouldn’t wait too long for performance and security reasons).
How the WordPress Gutenberg editor works
A second ago, I told you that Gutenberg is a block-based editor. It was kind of rude to leave you hanging because, if you’re like most people, you might not know what that means.
So here’s block-based editing 101:
Essentially, Gutenberg replaces the single edit field of the current WordPress TinyMCE editor with lots of individual “blocks”.
These blocks then allow you to build more complex designs than those allowed in the old classic WordPress editor.
So what’s a block?
Well, a block can be pretty much anything. For example, you can have blocks for:
- Regular text
- Images
- Video embeds
- Buttons
- Widgets (yes, those same widgets you use in your sidebar)
- Tables
- Etc.
And what’s neat is that developers will be able to create their own third-party blocks that you can access via plugins for even more flexibility.
Each block is its own entity that you can manipulate on an individual basis. For example, here’s a quick Gutenberg post that contains three blocks:
- 2 text blocks
- 1 image block
Watch how easily I can rearrange those blocks just by dragging and dropping them:

And because each block is “separate”, you can also add things like custom backgrounds just for specific blocks.
In general, it gives you more flexibility and in-depth control.
So Gutenberg is a page builder then, right?
Ehh, not quite. At least not in its current form.
Gutenberg is going to make it a lot easier to style regular content like blog posts or standard pages, but it’s not a 1:1 substitute for page builders in its current form.
Just on a surface level, Gutenberg already lacks two essential things:
- Flexible columns, though there is a basic column block and some third-party developers have created interesting Gutenberg blocks.
- True drag and drop – the newer version of Gutenberg lets you rearrange blocks with drag and drop, but it’s still not free-form like most page builders.
With that being said, the Gutenberg block editor is poised to eliminate the need for page builders for most “standard” content, and it also creates a single unified method for creating more complex post layouts in WordPress.
But when it comes to building more complex pages, like a landing page, you’re probably going to appreciate the greater flexibility offered by page builders (at least during Gutenberg’s initial release).
For example, in our comparison between Elementor vs Divi Builder vs Beaver Builder, you can see how the top page builders offer things like:
- Free-form drag and drop editing
- True multi-column support where you can create any number of columns to drag individual elements into
- Tons of pre-made templates
- Advanced styling options, with spots for custom margins/padding and lots more
- Responsive design settings
The block editor might get there someday. But at least in its initial release form, page builders will still give you the flexibility to design more complicated standalone pages.
Do you have to use the block editor? Can you keep the previous WordPress editor?
No, you do not have to use the block editor and yes, you can keep using the previous WordPress editor. To deactivate the Gutenberg block editor and return your site to the classic editor after upgrading to WordPress 5.0, you can use the official Classic Editor plugin.
Read our guide on how to disable the Gutenberg block editor to learn more.
Do you need a special theme to use the Gutenberg block editor?
Because it’s now the default WordPress editor, the block editor is built to work with any WordPress theme. However, choosing a theme that specifically offers Gutenberg compatibility will offer some very real benefits.
First, themes can offer built-in styling for all those new blocks. Better yet, themes can actually load these styles inside the editor. That means you can see the real styling for your blocks as you build your content for a better WYSIWYG experience (see a basic version of this in action here)
Gutenberg themes will also be able to offer pre-made templates comprised of various blocks so that all you need to do is plug your content into the existing blocks and hit Publish.
Additionally, there are some other small benefits like full-width image alignments. So – you can use whatever theme you want, but it is worth double checking to make sure that your theme’s developer is planning to add support.
If you just want to use a theme for testing, all of these themes have support for the block editor:
- Neve – Neve is our new theme that’s specifically built to work with the Gutenberg block editor.
- Zakra – a nice lightweight option from ThemeGrill.
- Hestia Lite – a flexible theme that follows material design principles.
Building your first layout with the Gutenberg WordPress block editor
Assuming you’re using WordPress 5.0 and the block editor, you’re ready to dig into the meat of this article. Below, I’ll show you how to actually use the WordPress Gutenberg block editor to build a complete page layout.
A quick tour of the WordPress block editor interface
Before you start adding some blocks, let’s go over a quick run-down of the elements of the main block editor interface:

- (A) – lets you add new blocks.
- (B) – undo/redo buttons
- (C) – view a list view (outline) of all your blocks – helpful for quickly navigating between blocks
- (D) – gives you access to document settings, covering things like categories & tags, featured images, etc. This is similar to the current sidebar in the WordPress editor
- (E) – when you have an individual block selected, this gives you access to settings that are specific to that block
- (F) – lets you access a live preview of your post or publish/update your post
- (G) – once you add some blocks, this is where you’ll actually work with your post’s content
Adding new blocks
As I discussed in the intro, you’ll use separate “blocks” to build your layouts with the editor.
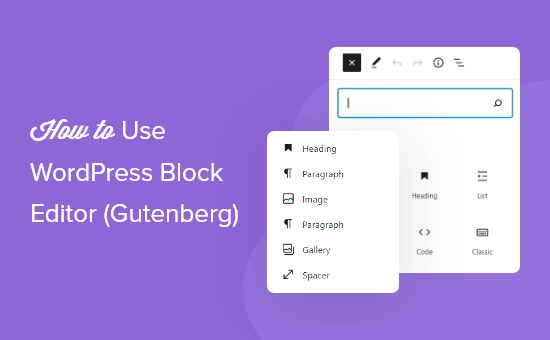
To add a new block, all you need to do is click the +Plus icon and select the type of content you want to add:

In the example above, I showed you how to add a basic paragraph block. But Gutenberg actually includes a ton of different blocks, divided into different sections:

- Text – things like paragraphs, headings, lists, quotes, etc.
- Media – insert images, galleries, videos, audio files, and other media.
- Design – add buttons, columns, sections, spacers, and more.
- Widgets – insert WordPress widgets, such as a list of categories or your latest posts.
- Embeds – embed content from third-party sources like Twitter, YouTube, Spotify, Vimeo, and others.
Building a basic layout with Gutenberg
Let’s start off simple. Say you just want to build a basic blog post layout that includes:
- Regular text
- An image
- A quote
- An embedded YouTube video
Here’s how you’d do it with Gutenberg:
First, you’d write your entire post in the editor. Or, if you’re like me and prefer to write in Google Docs, you can paste it all in and then Gutenberg will automatically convert it to blocks.
Adding the non-text blocks
Now that your content is split into blocks, you can hover over the spot where you want to insert your first image and click the plus icon. That will create a break. Then, click the plus icon again to insert the image block:

This will allow you to insert an image block, from which you can upload or select images in a similar manner to the current WordPress editor:

Once you select your image, you should see it right there in your page layout:

Next, hover over the spot where you want to insert the pull quote and use the same approach to insert another block. You can either search for “quote” or click to expand the full block inserter and look for it in the Text section:

Then, you’ll see your new pull quote block. To create your quote, all you need to do is click into the block and type:

To insert a YouTube video, you can add a new YouTube block from the Embeds section (or you can just search for YouTube). To insert a video, all you need to do is enter the URL and click Embed:

Optional – creating different columns
Want to get even more creative? Gutenberg includes a built-in Columns block that lets you quickly create multiple columns. All you need to do is add the Columns block from the Design section. Then, you can insert other blocks inside it. If you want even more flexible columns, you can also find third-party Gutenberg plugins that add those – more on block plugins later on.

Once you’re finished, all you need to do is click the Publish button:

And you’ll have your formatted blog post on the front-end.
How to customize individual blocks
Because the WordPress Gutenberg editor includes a ton of different blocks, I can’t show you how to use each individual block.
But I can give you a basic framework that applies to all blocks.
Basically, you control the content in the actual body of the editor:

For basic text styling and alignment, you can use the menu bar that appears when you hover over a block:

And for more advanced styling, you’ll usually style the block in the Block settings tab.
To access that tab, select the block you want to edit and browse to the Block tab:

How to rearrange individual blocks
To rearrange blocks, you have two options. You can use the Up or Down arrow in the block toolbar to move the block in that respective direction:

Or, you can drag and drop blocks. To activate the drag and drop functionality, you’ll need to click on the six dots beside the up and down arrows. Then, you can drag the block wherever you want to put it.

Putting it all together
Once you pick up the flow of how things work with the block editor, it’s fairly painless and intuitive.
At first, you might experience some growing pains and struggle to perform basic actions that you’ve taken for granted.
But once you get the hang of things – you should be cruising through building layouts. And with the more advanced blocks that Gutenberg comes with, you’ll have more flexibility than the TinyMCE WordPress Editor.
Some neat, but more advanced, Gutenberg tricks
As you become more acquainted with the WordPress Gutenberg block editor, you might find some of these tricks to be time-savers.
Quick-create a new block with typing
Above, I showed you how to create blocks using the insert button. But to save time, you can actually create blocks by simply typing this syntax:
/BLOCK-NAME
An auto-suggest box will appear to help you find the relevant block.
For example, here’s how to create an image block with just your keyboard:
Pretty convenient and a big time-saver!

Edit source code directly
At any point, you can edit the source code for your entire post by clicking on the three dots in the top-right and selecting Code Editor. You can also open the source code for an individual block by clicking the three dots menu on that block’s toolbar and selecting Edit as HTML:

Activate full-screen mode, fixed toolbar, etc.
The block editor includes a few different modes that let you change the editing experience. You can:
- Add a fixed toolbar like the TinyMCE editor
- Go full-screen
- Put a “spotlight” on the active block
To use these “Views”, click on the three dots icon in the top-right corner.

Use Gutenberg keyboard shortcuts to save time
Beyond standard formatting shortcuts, the block editor has a number of dedicated keyboard shortcuts that can help you:
- Insert new blocks above or below the selected block
- Delete a block
- Duplicate a block
- Etc.
To open the full list of keyboard shortcuts, use the Shift + Alt + H shortcut.

Use the outline to quickly navigate to specific blocks
The block outline gives you a high-level look at all the blocks in your design and lets you quickly select a specific block’s settings by clicking on it in list view. It’s especially useful when you have multiple blocks nested inside one another, such as content blocks inside a column.
To open the block outline, click the icon on the top toolbar. Then, click on the block that you want to jump to.

Use block patterns as templates
A “block pattern” is basically a template that you can use as a starting point for your designs. By default, WordPress comes with pre-built patterns for things like multi-column layouts, headers, etc. But plugins can also add their own block patterns.
To insert a block pattern:
- Click the main block inserter in the top-left corner (the plus icon).
- Choose the Patterns tab.
- Choose the pattern that you want to insert

Create reusable block templates
If you have a specific collection/arrangement of blocks that you need to reuse in multiple spots, you can save a group of blocks as a reusable template. You’ll be able to name your template. Then, you can insert it just like you would a regular block.
To create your template:
- Select the blocks that you want to include
- Click the three dots icon
- Select Add to Reusable blocks

Edit reusable block content
Beyond making it easy to quickly insert formatted content, reusable blocks also let you quickly update all instances of that reusable block.
That is, once you edit the reusable block content, every single post that uses that reusable block will also get the new content.
When you edit a reusable block and click the Publish button in a post or page, you’ll have the option to publish the full post or just publish the changes to the reusable block (or vice versa). You’ll see this in the menu that appears after you click Publish.

Extend the block editor with plugins
If you want to get fancy, you can now find plenty of Gutenberg extension plugins that add their own blocks.
Otter Blocks is a good option to get you started. It gives you additional blocks for things like pricing, testimonials, Google Maps, sharing icons, “click to tweet” buttons, and more.

Control clutter with Block Manager
The editor adds a lot of blocks, especially if you’re using some of those block plugins we mentioned above. This can make things a little cluttered and slow you down. If there are some blocks you never plan to use, you can use the Block Manager to disable them.
To use the Block Manager:
- Click the three dots icon in the top-right corner
- Select Block Manager
- Use the checkboxes to disable blocks as needed

Copy and paste blocks while preserving styles
For text in the block editor, you can copy and paste it just like any other editor. But if you want to copy and paste an entire block while also preserving its settings, you can’t just use Ctrl + C like you might be used to.
However, you still can do it. All you need to do is click the three dot icon in a block’s toolbar and select Copy. Once you’ve copied it in this way, you can paste it just like you would normally paste content (e.g. Ctrl + V).

Switch between Edit and Select modes
With WordPress 5.4, you get access to two different modes, which you can switch between by using the top toolbar:
- Edit – this is what you’ll work in most of the time. It lets you edit the content of all your blocks. This is the default editor mode.
- Select – this makes it easier to select specific blocks, especially when working with nested blocks (e.g. blocks inside a column). Once you click into a block, you’ll automatically switch back to Edit mode.

Experiment with new block editor features
Ever since the block editor was merged into the core, there are actually two versions of the block editor:
- The native version in the core WordPress software (this is likely what you’re using)
- The Gutenberg plugin
The Gutenberg plugin version is basically a testing ground for the core editor. The plugin version contains new features that are under development. Eventually, those features will be merged into the core. But if you want to play around with them early, all you need to do is install the Gutenberg plugin from WordPress.org.

What happens to all of your old content?
Before I finish covering the content editing features in the block editor, let me quickly cover what will happen to all of your old content once you start using the WordPress block editor (if you haven’t already).
Don’t worry – it won’t disappear! But the experience is a little bit different:
When you enable the block editor, and you have existing content built with the original TinyMCE editor, the block editor will put all of your old content into a single Classic block. This Classic block is basically the TinyMCE editor…but embedded inside the block editor.
To work with your old content, you can either:
- Leave it in the Classic block and edit it just like you would with the old WordPress editor
- Click the Convert to blocks button on the toolbar for the Classic block to convert your content into separate blocks

How to use the block editor with full-site editing
As we mentioned earlier, the goal for the block editor is to use it for a lot more than just a content editor. More specifically, the end goal is full-site editing, which means that you’ll be able to use the block editor to create the actual templates for your theme.
Full-site editing isn’t quite here yet, but the core team has already started adding some full-site editing features to the WordPress core as of WordPress 5.8, which was released in July 2021. Currently, the version of the editor in the core WordPress software supports the following full-site editing features:
- Replacing WordPress widgets with blocks. You’ll now use blocks to manage your sidebar, footer, and other widget areas.
- Theme blocks. These let you display dynamic content from your site/theme, like a post’s publish date or a list of your most recent blog posts.
- Template editing. This lets you design the actual templates for your posts and pages. You can then choose different templates for your content.
Let’s go through these new WordPress full-site editing features…
Using blocks instead of widgets
As of WordPress 5.8, widgets are no more! Now, instead of using widgets to control your sidebar, footer, and other widget areas, you’ll use blocks and a simplified version of the block editor.
When you open the widgets area by going to Appearance > Widgets or using the WordPress Customizer, you’ll see the new interface powered by blocks. These editors work exactly like the block editor above – the interface is just a little stripped-down:

If you don’t like this feature and want to continue using the old WordPress widget system, you can disable this feature by installing the official Classic Widgets plugin.
WordPress theme blocks
Theme blocks are a new feature in WordPress 5.8 that will play a key role in full-site editing. Essentially, they let you insert dynamic content from your website, instead of static content.
For example, let’s say you want to display the publish date of a post at a certain spot in your content. Instead of manually typing in the date, you could just add the Post Date block and it would automatically insert the actual publish date of the post. If you update the post’s publish date, the Post Date block would automatically show that new date.
The most useful theme block is probably the Query Loop block, which lets you insert a list of your most recent content. You can also use filters to choose specific content. For example, you could list the five most recent blog posts in a certain category.
You’ll also be able to control the template for how your posts display, like changing the order of the post title and featured image:

This Query Loop block is especially useful because it essentially lets you create your own blog listing pages using just the block editor.
You can find all of the new blocks in the Theme section of the block inserter:

WordPress block editor template editing mode
The new template editing mode in WordPress 5.8 is probably the biggest step towards WordPress full-site editing.
With template editing mode, you can use the block editor to design the actual templates that your posts and pages use. For example, you could design a template where the content appears in a multi-column layout instead of the normal single-column layout. Whenever you assign that template to a regular post, that post would automatically use the template’s layout – there wouldn’t be a need to manually recreate it.
To build your templates, you can use the theme blocks that we detailed in the previous section.
Template editing mode is a core feature as of WordPress 5.8. However, it will only be visible if your theme’s developer has specifically enabled it in the theme’s code. So if you don’t see the options in the screenshots below, it’s probably because your theme doesn’t support it yet.
If your theme supports template editing mode, you should see a new Template section in the Post/Page sidebar when you’re editing a post or page.
You can use that section to choose an existing template or create a new one:

If you create a new template, you’ll be able to design it using the regular WordPress block editor and the theme blocks that we detailed above.
What’s next for the Gutenberg block editor?
While everything that we’ve detailed above shows a lot of growth since the initial release of the block editor, the WordPress team is far from finished with the Gutenberg project.
Currently, the core team is continuing to work on improving and expanding full-site editing. More and more developers are also creating block-based themes, which let you harness the power of Gutenberg to build your entire site.
While these features are not here quite yet, they’re on the way. For that reason, it will pay to start learning the block editor interface ASAP! If you want to test block-based themes out for yourself, the plugin version of Gutenberg currently includes an array of full-site editing features that give you an idea of what the experience might be like. You can also find block-based themes at WordPress.org.
Overall, Gutenberg is definitely here to stay, so it’s worth it to put time into learning how to get the most from it.
For most casual users, it will, after some growing pains, bring a more flexible content creation experience.
Non-developers will be able to intuitively craft more complex layouts with extra elements like buttons, content embeds, and lots more. And that will, hopefully, help WordPress to continue to grow.