CloudFormation is the Infrastructure as Code (IaC) tool offered by the largest cloud service provider in the world, Amazon Web Services. In 2017, over 350,000 AWS customers used AWS CloudFormation to deploy and manage over 2.4 million infrastructure stacks. Impressive.
What is CloudFormation?
AWS CloudFormation is a configuration orchestration tool that allows you to codify your infrastructure to automate your deployments.
CloudFormation templates can be created with YAML in addition to JSON. Or you can use AWS CloudFormation Designer to visually create your templates and see the interdependencies of your resources.
CloudFormation takes a declarative approach to configuration, meaning that you tell it what you want your environment to look like, and it finds its way there.
During this configuration process, CloudFormation automatically manages dependencies between your resources. Thus, you don’t have to specify the order in which resources are created, updated, or deleted. CloudFormation automatically determines the correct sequence of actions to create your environment, though you can use the DependsOn attribute, wait condition handlers, and nested stacks to specify the order of operations, if necessary.
Sometimes updating an infrastructure stack can cause anxiety because you’re not sure what changes might break the environment. Not to fear! CloudFormation Change Sets allow you to preview how your resources will be impacted before any changes are executed. Only after you execute your change set will your stack be edited.

Even if you execute a change set that has errors in it, CloudFormation has Rollback Triggers that allow you to monitor your stack creation or update process and roll back your environment to a previous state. You can specify thresholds to monitor in CloudWatch and integrate them into your CloudFormation templates. When these thresholds are exceeded, the Rollback Triggers revert your environment back to the previously deployed state.
CloudFormation StackSets allow you to deploy, update, or delete infrastructure stacks across multiple AWS regions and accounts with a single CloudFormation template. Before StackSets existed, every infrastructure environment had to be deployed independently, and custom scripts had to be written to deploy these stacks to multiple accounts and regions. StackSets now make it much easier to maintain consistency when you add new regions and accounts.
And Custom Resources let you write custom provisioning logic in your CloudFormation scripts. For instance, if you’d like to define resources that CloudFormation doesn’t support yet, or if you need to create a resource that’s specific to your use case, Custom Resources allows you to manage all of this in a single stack.
CloudFormation supports many AWS services. AWS frequently releases additional useful functionality, so the sky’s the limit on the things you can do with CloudFormation.
We’re going to dig deeper into CloudFormation, provide a template that we wrote that creates a virtual private cloud (VPC), and dissect how it works.
How AWS CloudFormation works?
Here’s a super simple CloudFormation template that creates an S3 bucket:
AWSTemplateFormatVersion: 2010-09-09
Description: Bucket Stack
Resources:
  S3Bucket:
    Type: AWS::S3::Bucket
    Properties:
      BucketName: my-bucket
You can create CloudFormation templates using JSON or YAML. We prefer the latter, so all the templates included in this article are in YAML. Regardless of which you choose, templates can consist of the primary sections of information highlighted below, with the Resources section being the only one that is mandatory.
Format Version (optional)
This is the AWS CloudFormation template version that your template conforms to and identifies the capabilities of the template. This is not the same as the API or WSDL version.
At the moment, the latest and only valid template version is 2010-09-09.
While there is only one valid version at the moment and this field is optional, it’s a good idea to include it in your templates for future reference.
Description (optional)
This section is a text string that provides the reader with a short description (0 to 1024 bytes in length) of the template. This section must come right after the Format Version section.
Be descriptive but concise!
Metadata (optional)
This section isn’t used all that often, but here you can include additional information about your template. This can include information for third-party tools that you may use to generate and modify these templates and other general data.
Please note that the Metadata section is not to be confused with the Metadata attribute that falls under the Resources section. This Metadata section should include information about the template overall, while the Metadata attribute should include data about a specific resource.
Parameters (optional)
You can use the Parameters section to input custom values to your template when you create or update a stack so you can make these templates portable for use in other projects.
For instance, you can create parameters that specify the EC2 instance type to use, an S3 bucket name, an IP address range, and other properties that may be important to your stack.
The Resources and Output sections often refer to Parameters, and these references must be included within the same template.
Mappings (optional)
The Mappings section allows you to create key-value dictionaries to specify conditional parameter values.
Examples of this include deploying different AMIs for each AWS region, or mapping different security groups to Dev, Test, QA, and Prod environments that otherwise share the same infrastructure stack.
To retrieve values in a map, you use the “FN::FindInMap” intrinsic function in the Resources and Outputs sections.
Conditions (optional)
Conditions allow you to use logic statements (just like an “if then” statement) to declare what should happen under certain situations.
We mentioned an example above about Dev, Test, QA, and Prod environments. In this case, you can use conditions to specify the type of EC2 instance to deploy in each of these environments. If the environment is Prod, you can set the EC2 instance to be m4.large. If the environment is Test, you can set it to be t2.micro to save money.
Transform (optional)
The Transform section allows you to simplify your CloudFormation template by condensing multiple lines of resource declaration code and reusing template components.
There are two types of transforms that CloudFormation supports:
- “AWS::Include” refers to template snippets that reside outside of the main CloudFormation template you’re working with. Thus, you can make multi-line resource declarations in YAML or JSON files stored elsewhere and refer to them with a single line of code in your primary CloudFormation template.
- “AWS::Serverless” specifies the version of the AWS Serverless Application Model (SAM) to use and how to process it.
You can declare multiple transforms in a template and CloudFormation executes them in the order specified. You can also use template snippets across multiple CloudFormation templates.
Resources (required)
The Resources section is the only section that is required in a CloudFormation template.
In this section, you declare the AWS resources, such as EC2 instances, S3 buckets, Redshift clusters, and others, that you want deployed in your stack. You also specify the properties, such as instance size, IAM roles, and number of nodes, for each of these components.
This is the section that will take up the bulk of your templates.
Outputs (optional)
In the Outputs section, you’ll describe the values that are returned when you want to view the properties of your stack.
You can export these outputs for use in other stacks, or simply view them on the CloudFormation console or CLI as a convenient way to get important information about your stack’s components.
That’s a lot of information about CloudFormation sections to digest. All of this will become clearer as we walk through some real-world templates, which we’ll do now.
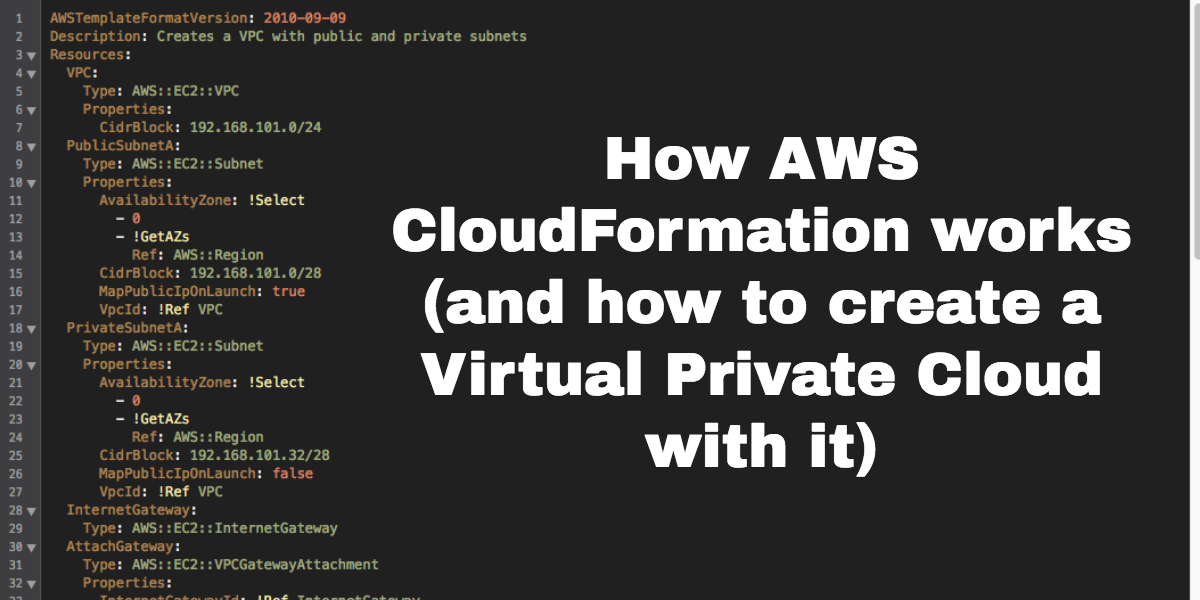
Creating a VPC with AWS CloudFormation
The template we’ve provided below creates a virtual private cloud (VPC) with public and private subnets. This will allow you to launch AWS resources in a virtual network that you define and have complete control over.
In this template, we create a VPC with a public subnet for your web servers that are publicly addressable, and a private subnet where your backend components like databases or application servers will reside and be safe from the prying eyes of the internet.
The public subnet will connect to the internet via an Internet Gateway, and a Route Table tells the public subnet how to find the Internet Gateway.
We’ll then replicate the public and private subnets in another availability zone for high availability.
This template is pretty straightforward and only contains the Format Version, Description, and Resources sections.
Here’s the CloudFormation template in its entirety:
AWSTemplateFormatVersion: 2010-09-09
Description: Creates a VPC with public and private subnets
Resources:
  VPC:
    Type: AWS::EC2::VPC
    Properties:
      CidrBlock: 192.168.101.0/24
  PublicSubnetA:
    Type: AWS::EC2::Subnet
    Properties:
      AvailabilityZone: !Select
        - 0
        - !GetAZs
          Ref: AWS::Region
      CidrBlock: 192.168.101.0/28
      MapPublicIpOnLaunch: true
      VpcId: !Ref VPC
  PrivateSubnetA:
    Type: AWS::EC2::Subnet
    Properties:
      AvailabilityZone: !Select
        - 0
        - !GetAZs
          Ref: AWS::Region
      CidrBlock: 192.168.101.32/28
      MapPublicIpOnLaunch: false
      VpcId: !Ref VPC
  InternetGateway:
    Type: AWS::EC2::InternetGateway
  AttachGateway:
    Type: AWS::EC2::VPCGatewayAttachment
    Properties:
      InternetGatewayId: !Ref InternetGateway
      VpcId: !Ref VPC
  PublicRouteTable:
    DependsOn: AttachGateway
    Type: AWS::EC2::RouteTable
    Properties:
      VpcId: !Ref VPC
  PublicDefaultRoute:
    Type: AWS::EC2::Route
    Properties:
      DestinationCidrBlock: 0.0.0.0/0
      GatewayId: !Ref InternetGateway
      RouteTableId: !Ref PublicRouteTable
  PublicRouteAssociationA:
    Type: AWS::EC2::SubnetRouteTableAssociation
    Properties:
      RouteTableId: !Ref PublicRouteTable
      SubnetId: !Ref PublicSubnetA
  PublicSubnetB:
    Type: AWS::EC2::Subnet
    Properties:
      AvailabilityZone: !Select
        - 1
        - !GetAZs
          Ref: AWS::Region
      CidrBlock: 192.168.101.16/28
      MapPublicIpOnLaunch: true
      VpcId: !Ref VPC
  PrivateSubnetB:
    Type: AWS::EC2::Subnet
    Properties:
      AvailabilityZone: !Select
        - 1
        - !GetAZs
          Ref: AWS::Region
      CidrBlock: 192.168.101.48/28
      MapPublicIpOnLaunch: false
      VpcId: !Ref VPC
  PublicRouteAssociationB:
    Type: AWS::EC2::SubnetRouteTableAssociation
    Properties:
      RouteTableId: !Ref PublicRouteTable
      SubnetId: !Ref PublicSubnetB
You can download this template here.
OK! Let’s dig into what’s going on here.
Creation of the VPC and public and private subnets
First, we add a VPC that encompasses the entire network we’re about to create:
Resources:
  VPC:
    Type: AWS::EC2::VPC
    Properties:
      CidrBlock: 192.168.101.0/24
Here’s what’s going on:
- VPC: This is the name you give to the resource.
- Type: This defines the CloudFormation resource type. Check out the resource type documentation to find supported properties.
- Properties: Each resource has required and optional properties. In this case, you can define the IP address range in CIDR notation.
Next we add a public and private subnet:
  PublicSubnetA:
    Type: AWS::EC2::Subnet
    Properties:
      AvailabilityZone: !Select
        - 0
        - !GetAZs
          Ref: AWS::Region
      CidrBlock: 192.168.101.0/28
      MapPublicIpOnLaunch: true
      VpcId: !Ref VPC
  PrivateSubnetA:
    Type: AWS::EC2::Subnet
    Properties:
      AvailabilityZone: !Select
        - 0
        - !GetAZs
          Ref: AWS::Region
      CidrBlock: 192.168.101.32/28
      MapPublicIpOnLaunch: false
      VpcId: !Ref VPC
As before, you’ll notice the same resource structure of name, type, and supported properties. The “AWS::EC2::Subnet” type happens to support a few more properties.
The above example also uses some special syntax to make the template a little more dynamic, such as:
Pseudo parameters
A pseudo parameter dynamically resolves to a value, given the context of the CloudFormation stack. For example, “Ref: AWS::Region” gets converted to the region in which you deploy the template (i.e. us-east-1).
Intrinsic functions
A CloudFormation template is configuration, not code. However, you have access to some basic runtime logic.
In the above example, “!GetAZs Ref: AWS::Region” gets all the availability zones in the current region. And the “!Select” function gets the first AZ in the list.
Another use of an intrinsic function is “!Ref VPC”. This gets the VPC ID of the VPC resource defined earlier.
Here’s a breakdown of what’s happening in the code above.
- PublicSubnetA is our public subnet, and any EC2 instances provisioned will be given a public IP address.
- PrivateSubnetA is our private subnet.
- Each subnet is provisioned in the first availability zone in the current region. For example, this could be “us-east-1a”.
- Each subnet is placed inside the VPC defined earlier.
- Each subnet’s IP address range contains 16 addresses. These ranges are non-overlapping, and fall within the overall VPC’s IP range.
We wind up with this architecture:

Adding an Internet Gateway and Route Table
Next, we create an Internet Gateway. This allows instances within the VPC to access the internet. And it also allows the internet to access servers within the public subnet:
  InternetGateway:
    Type: AWS::EC2::InternetGateway
  AttachGateway:
    Type: AWS::EC2::VPCGatewayAttachment
    Properties:
      InternetGatewayId: !Ref InternetGateway
      VpcId: !Ref VPC
Behind the scenes, the Internet Gateway has no way to associate itself with our VPC. So you have to create an “AWS::EC2::VPCGatewayAttachment” resource to perform this task.
Next we create a Route Table, plus a few related resources:
  PublicRouteTable:
    DependsOn: AttachGateway
    Type: AWS::EC2::RouteTable
    Properties:
      VpcId: !Ref VPC
  PublicDefaultRoute:
    Type: AWS::EC2::Route
    Properties:
      DestinationCidrBlock: 0.0.0.0/0
      GatewayId: !Ref InternetGateway
      RouteTableId: !Ref PublicRouteTable
  PublicRouteAssociationA:
    Type: AWS::EC2::SubnetRouteTableAssociation
    Properties:
      RouteTableId: !Ref PublicRouteTable
      SubnetId: !Ref PublicSubnetA
The Route Table only has one property, “VpcId: !Ref VPC”, which associates itself with a VPC.
Route (“AWS::EC2::Route”) resources contain a single route, which points an IP address range to a gateway. The Route associates itself with the Route Table.
A Subnet Route Table Association wires up the route table to a subnet. In this case, the Route Table directs all traffic from PublicSubnetA to the internet.
One thing to note is the “DependsOn” attribute. CloudFormation is usually pretty good about spinning up dependencies in the correct order. However, you can use the “DependsOn” attribute to explicitly define a dependency.
This architecture shows the addition of the Internet Gateway and Route Table:

Replicate subnets for high availability
Finally, we replicate the subnets into a new availability zone to facilitate high availability.
  PublicSubnetB:
    Type: AWS::EC2::Subnet
    Properties:
      AvailabilityZone: !Select
        - 1
        - !GetAZs
          Ref: AWS::Region
      CidrBlock: 192.168.101.16/28
      MapPublicIpOnLaunch: true
      VpcId: !Ref VPC
  PrivateSubnetB:
    Type: AWS::EC2::Subnet
    Properties:
      AvailabilityZone: !Select
        - 1
        - !GetAZs
          Ref: AWS::Region
      CidrBlock: 192.168.101.48/28
      MapPublicIpOnLaunch: false
      VpcId: !Ref VPC
  PublicRouteAssociationB:
    Type: AWS::EC2::SubnetRouteTableAssociation
    Properties:
      RouteTableId: !Ref PublicRouteTable
      SubnetId: !Ref PublicSubnetB
This is all quite similar to the what we already created for public and private subnet A. Like before, the IP address ranges are unique and non-overlapping. The main difference with set B is that they get provisioned in the second availability zone rather than the first.
One thing to note is that PublicSubnetB needs its own route association, since it’s one association per subnet.
Finally, you wind up with this beautiful VPC architecture:

You now have the network infrastructure to launch EC2 instances, databases, or other AWS resources with some baseline security! You can use this template as a starting point for future projects.