As the security needs of modern web applications continue to grow, reliable identity authentication and authorization systems become imperative. In this context, Keycloak’s open-source, flexible, and trusted identity management solutions provide a solution to the security challenges. Keycloak makes it easy to work with many applications, not just Spring Boot projects. However, with the deprecation of
WebSecurityConfigurerAdapterand the migration of Spring Security to 6.x, things got a bit confusing. But no worries, in this article, I will cover how to integrate Keycloak with Spring Security, using newer versions of both.
I will be using
and as the IDE, IntelliJ IDEA.
Keycloak Configurations
Note: If you already have an idea about Keycloak, you can skip this step and go to the Spring Boot Application Configurations setting by this link.
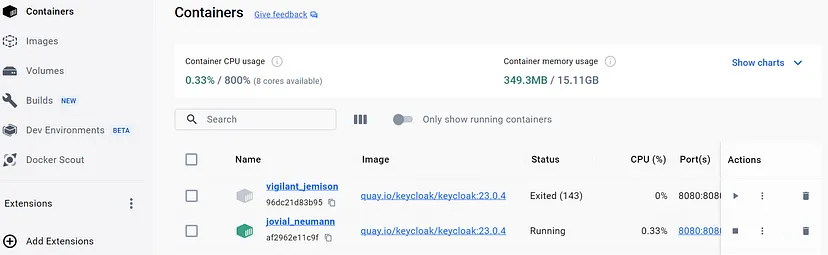
Keycloak is an open-source platform (server) designed to centrally manage user identities and access to applications. To use Keycloak, you can download it through this link. But if you have Docker on your PC, I recommend using the docker command to start Keycloak instead of setting up a Keycloak server on the computer.
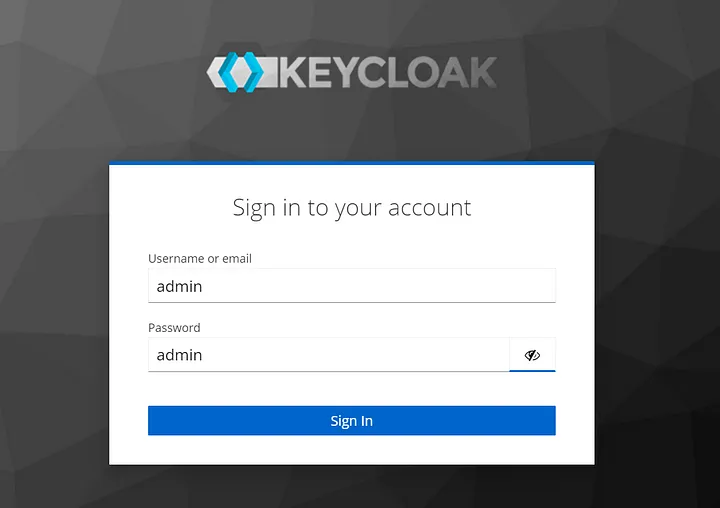
docker run -p 8080:8080 -e KEYCLOAK_ADMIN=admin -e KEYCLOAK_ADMIN_PASSWORD=admin -v ${HOME}/docker_volumes/keycloak:/opt/keycloak/data quay.io/keycloak/keycloak:23.0.4 start-devFrom the terminal, once you enter this command, it runs a Keycloak container with the specified parameters, making Keycloak accessible at http://localhost:8080. The admin console can be accessed through http://localhost:8080/admin.
Your initial username and password will both be “admin” as specified in the command.
1. Creating Realm
After login, you should create a realm:
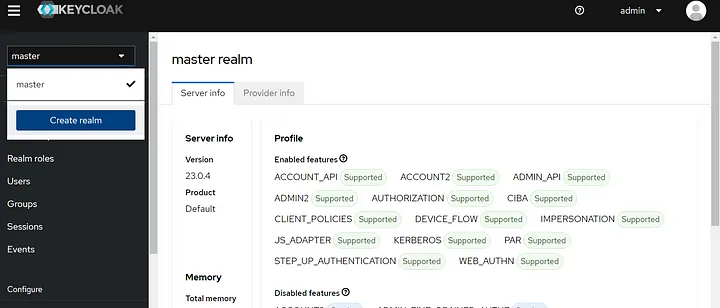
Realms are the structures that allow an administrator to create isolated groups of applications and users. Keycloak describes the realms as tenants in Keycloak.
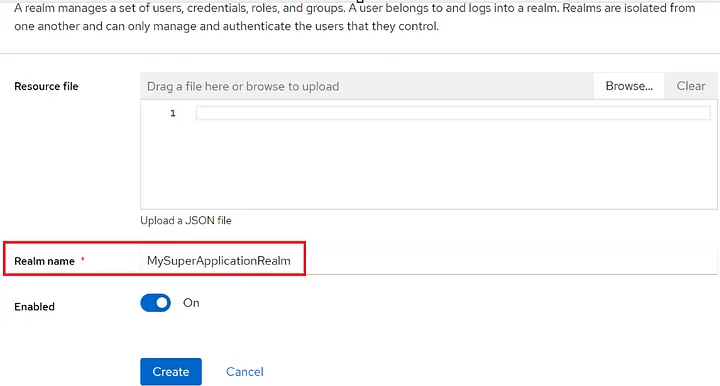
The master realm is just to manage Keycloak. Therefore I create my realm:
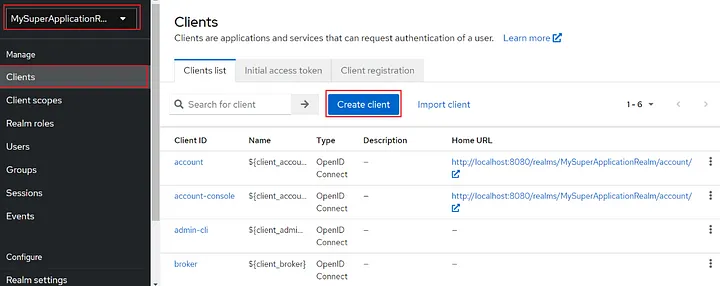
2. Creating Client
And now we need a client to protect our application. According to the official documentation of Keycloak, clients are applications and services that can request authentication of a user.
To create a new client in MySuperApplicationRealm, I click the “Clients” button on the left menu and then click on the “Create client” button:
And then on the next page, I give just the “Client ID”:
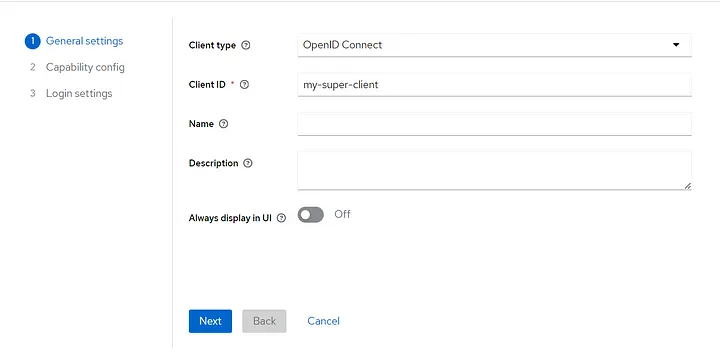
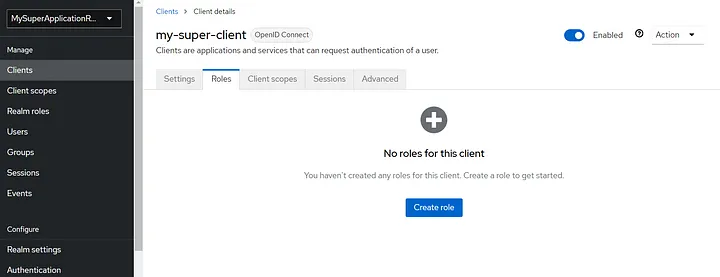
In the next screens, keep the default configurations and save. Now the client was successfully created.
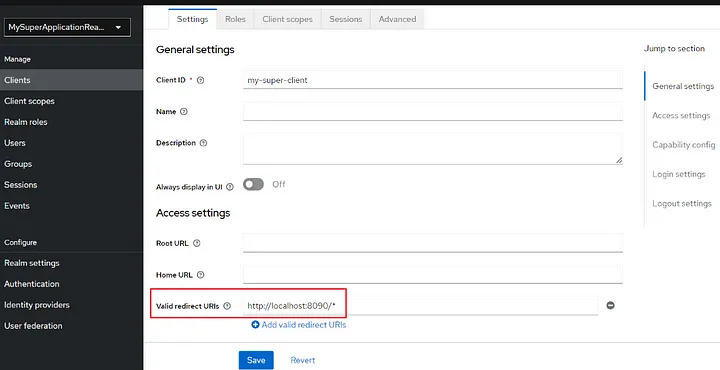
Then we need to provide a Valid Redirect URIs.
The Keycloak server runs on port 8080. So I want to run my Spring Boot application on port 8090. So I give http://localhost:8090/* as redirect URIs and click on the ‘save’ button.
3. Creating Roles
Keycloak provides a convenient way to create roles, assign them to users, and manage application roles effectively. In Keycloak mainly there are two types of roles.
- Client Roles: These roles are specific to a particular client application. Clients are created in the Keycloak administration interface and can be assigned to users within a specific client.
- Realm Roles: These roles represent a realm, which can be a real or virtual application domain. Realm roles are applicable to all clients within a realm and can be assigned to users across the entire realm.
And in addition to them, there are composite roles. A composite role is not a role type but a special role that includes multiple authorities.
First I create two client roles called userand admin. To do this, I click on the client that I created and then click on“Create role” :
It should now look like this:

As you can see, they are not composite roles yet, and they don’t need to be composite by default — only when necessary. I will make them composite just for the sake of this example. So I create two realm roles. To do this, navigate to the Realm Roles page to create roles.
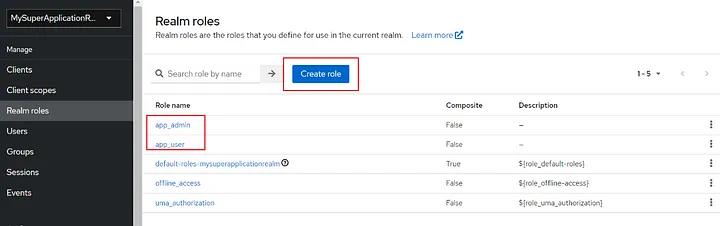
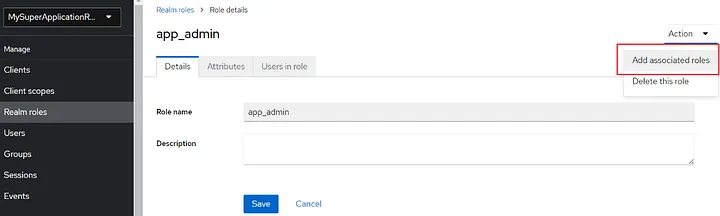
I created app_admin and app_user by clicking on the button in the rectangle. And then click on one and on the prompted page click on the right-top dropdown menu and select the “Add associated roles” option:
and on the page that came up, change the filter to “Filter by clients”. You will see your client roles:
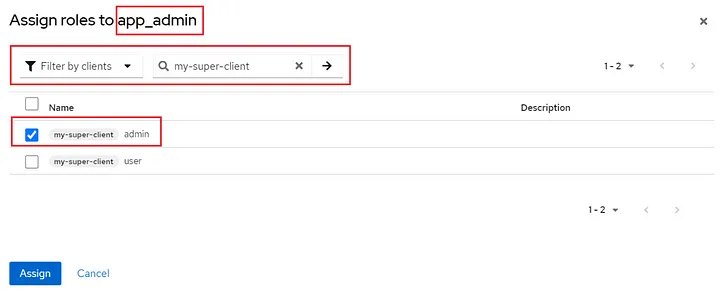
I assign the client role admin to the realm role app_admin. And follow the same steps for the app_userrole.
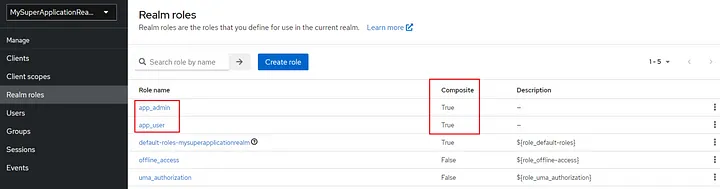
If you added those correctly, Realm roles will be composite.
4. Creating Users
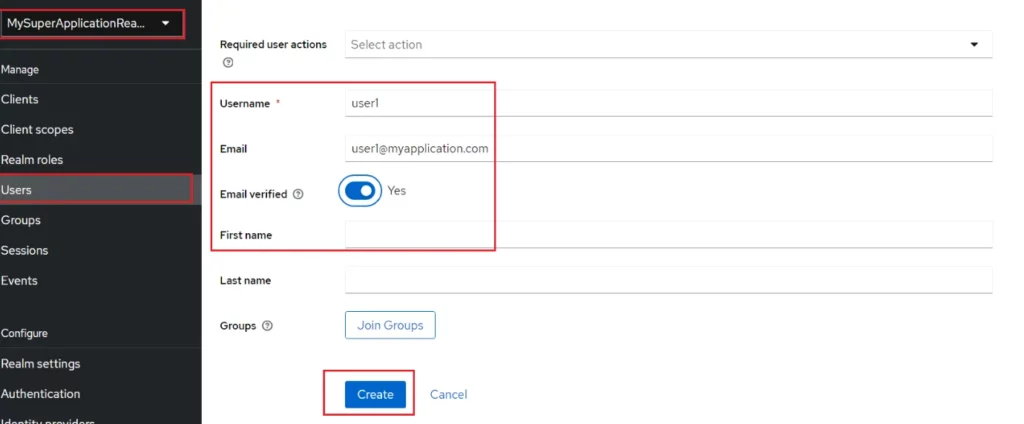
The last part that needs to be added is the users. I go to the Users page and create three users with these roles:
- user1 with
app_adminrole - user2 with
app_userrole - user3 with
app_userandapp_adminroles
I go to the “Users” page and click on “Add user”:
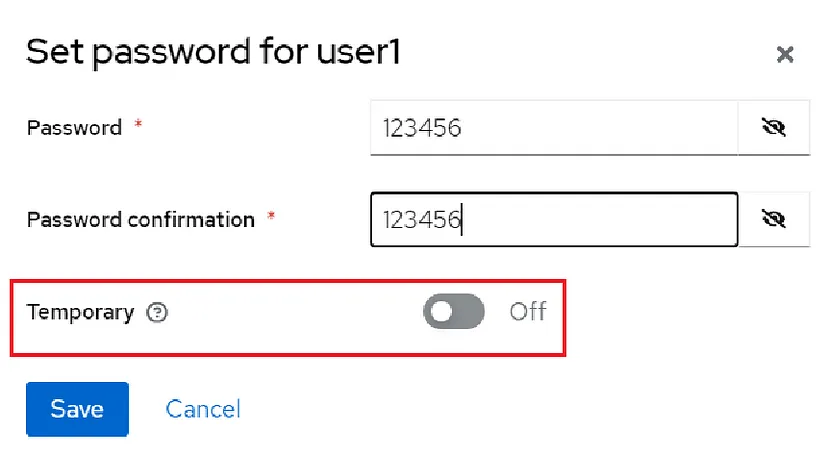
Now I need to set passwords for users. I go to the “Users” page and click on user1 and select the “Credentials” tab on the page that came and then click on “Set password” button:
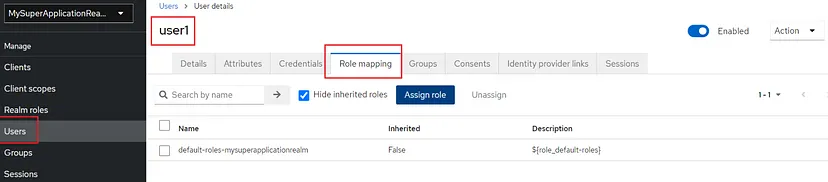
After saving credentials I click on the “Role mapping” tab:
When the ‘Assign Role’ button is clicked, the list of realm roles will be available:
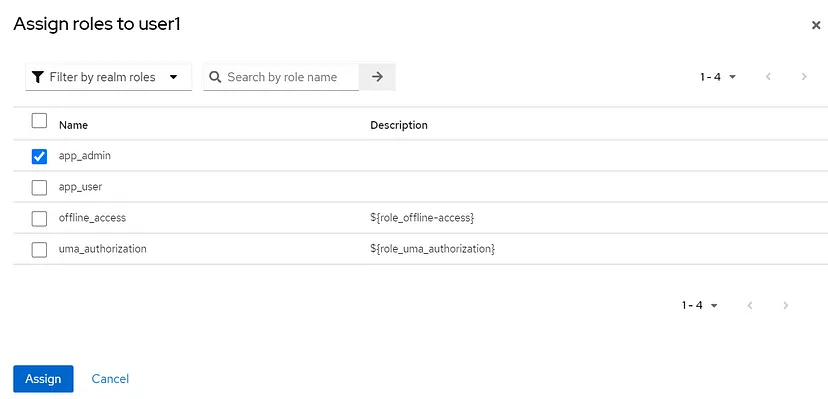
I set the same password to other users as well, and I assigned the roles I mentioned above to the relevant users.
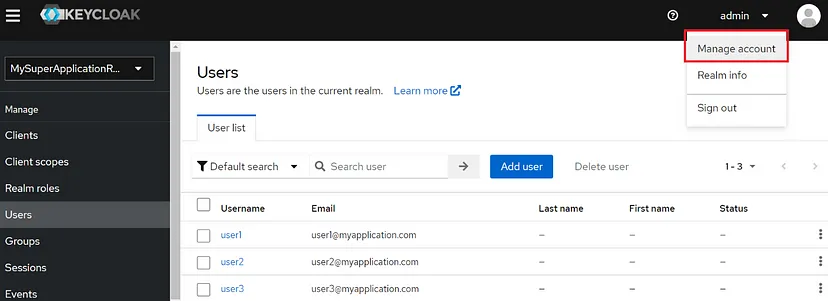
Up to this point, authentication and authorization processes are complete. Remember to customize your Keycloak account credentials for the safety of the application. You can use the “Manage account” menu to do this:
By the
-v ${HOME}/docker_volumes/keycloak:/opt/keycloak/dataflag in the docker command we used at the beginning, we copied our credentials data from the docker container to our PC. And remember please, If you have already this kind of file in the path on the PC, Keycloak reads these credentials to run. Or you can just run specific containers for specific projects and their credentials by using Docker Desktop.
Now let’s move on to obtaining the token.
When you go to the “Realm settings” section on the sidebar you will see the
“OpenID Endpoint Configuration” link:
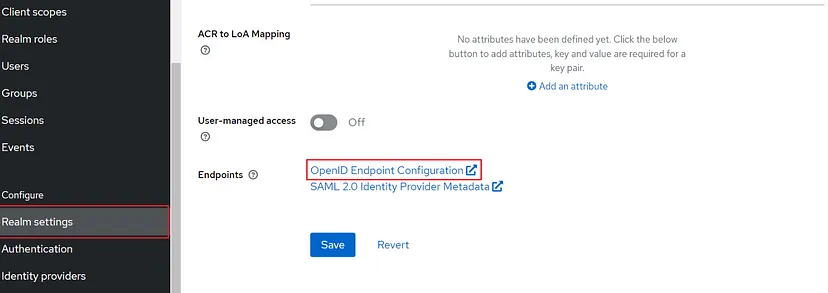
When you click on this link, you will see a list of available endpoints:
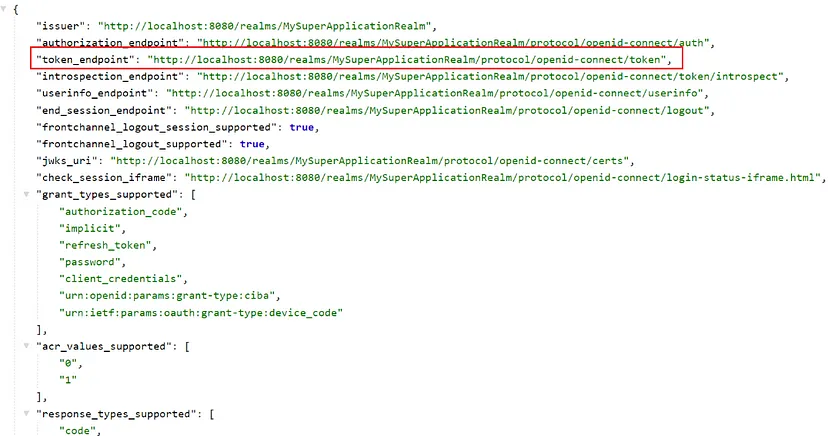
We can send now a post request to this endpoint to get a token. We can use one of the users we created as the credentials. I use postman for this request:
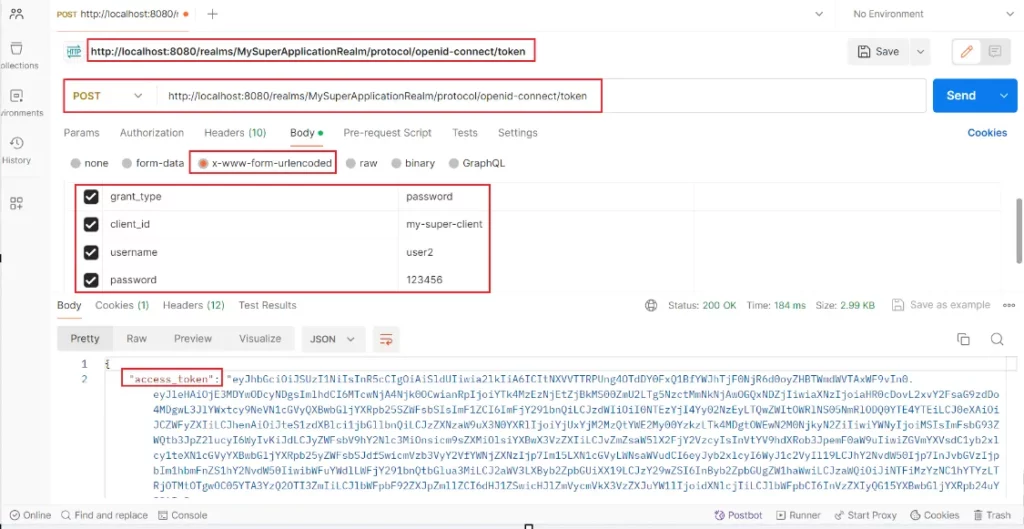
When you configure the settings indicated in the image, you will be able to obtain the access token.
Spring Boot Application Configurations
The Keycloak configuration concludes here. Now, we can proceed to integrate it with our Spring Boot application.
Creating Spring Boot Project
I’m using Spring Boot version 3, Java 17, and Maven as the package manager.
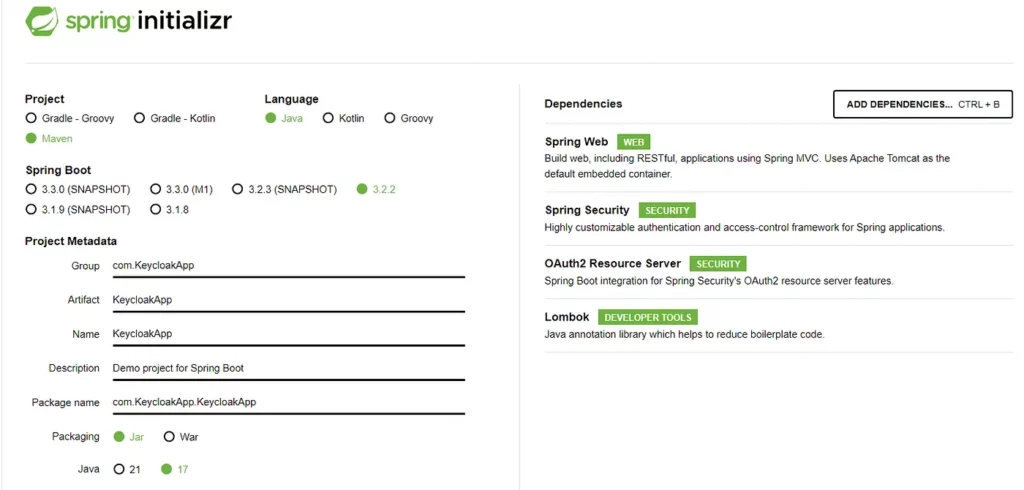
After settings, adding necessary dependencies, generating and downloading the project I open it by IntelliJ IDEA and change the port from the default value 8080 to 8081on which the project will run, in the application.properties file as Keycloak runs on port 8080.
server.port=8081I am creating now a simple REST API to test the application. I am just adding the class below under the package controller I created.
@RestController
@RequestMapping("/api")
public class ControllerHello{

    @GetMapping("/hello")
    public ResponseEntity<String> sayHello() {
        return ResponseEntity.ok("Hello");
    }

    @GetMapping("/admin")
    public ResponseEntity<String> sayHelloToAdmin() {
        return ResponseEntity.ok("Hello Admin");
    }

    @GetMapping("/user")
    public ResponseEntity<String> sayHelloToUser() {
        return ResponseEntity.ok("Hello User");
    }
}
Keycloak Integration
In the application.properties file, I add the following settings:
spring.application.name=KeycloakSpringBootApplication

# Security Configuration
spring.security.oauth2.resourceserver.jwt.issuer-uri=http://localhost:8080/realms/MySuperApplicationRealm
spring.security.oauth2.resourceserver.jwt.jwk-set-uri=${spring.security.oauth2.resourceserver.jwt.issuer-uri}/protocol/openid-connect/certs

# JWT Configuration
jwt.auth.converter.resource-id=my-super-client
jwt.auth.converter.principal-attribute=principal_username

# Logging Configuration
logging.level.org.springframework.security=DEBUGspring.application.name=KeycloakSpringBootApplication: This setting defines the name of the Spring application. It represents the overall name of the application.spring.security.oauth2.resourceserver.jwt.issuer-uri: This setting specifies the Issuer URI for JWT authentication. It includes the URI of the Keycloak realm.spring.security.oauth2.resourceserver.jwt.jwk-set-uri: Specifies the JWK set URI at the location where JWT will be used. This URI is used to fetch public keys.jwt.auth.converter.resource-id: Specifies the resource ID of the JWT. Typically, it includes a client identifier.jwt.auth.converter.principal-attribute: Specifies a specific attribute name in the JWT’s header (such asprincipal_username) where principals (users) are indicated.
Now, I need security to protect my API. To achieve this, I will create a SecurityConfig class using Spring Security. However, as I aim to integrate my project with Keycloak, I initially create two classes to decode the JWT obtained from the Keycloak server.
Under the security package:
@Data
@Validated
@Configuration
@ConfigurationProperties(prefix = "jwt.auth.converter")
public class JwtConverterProperties {

    private String resourceId;
    private String principalAttribute;
}
The JwtConverterProperties class is a configuration class for JWT authentication conversion. It holds properties like “resourceId” (Keycloak resource identifier) and “principalAttribute” (preferred principal attribute). These properties play a crucial role in decoding and processing JWTs within the Keycloak integration.
@Component
public class JwtConverter implements Converter<Jwt, AbstractAuthenticationToken> {

    private final JwtGrantedAuthoritiesConverter jwtGrantedAuthoritiesConverter = new JwtGrantedAuthoritiesConverter();

    private final JwtConverterProperties properties;

    public JwtConverter(JwtConverterProperties properties) {
        this.properties = properties;
    }

    @Override
    public AbstractAuthenticationToken convert(Jwt jwt) {
        Collection<GrantedAuthority> authorities = Stream.concat(
                jwtGrantedAuthoritiesConverter.convert(jwt).stream(),
                extractResourceRoles(jwt).stream()).collect(Collectors.toSet());
        return new JwtAuthenticationToken(jwt, authorities, getPrincipalClaimName(jwt));
    }

    private String getPrincipalClaimName(Jwt jwt) {
        String claimName = JwtClaimNames.SUB;
        if (properties.getPrincipalAttribute() != null) {
            claimName = properties.getPrincipalAttribute();
        }
        return jwt.getClaim(claimName);
    }

    private Collection<? extends GrantedAuthority> extractResourceRoles(Jwt jwt) {
        Map<String, Object> resourceAccess = jwt.getClaim("resource_access");
        Map<String, Object> resource;
        Collection<String> resourceRoles;

        if (resourceAccess == null
                || (resource = (Map<String, Object>) resourceAccess.get(properties.getResourceId())) == null
                || (resourceRoles = (Collection<String>) resource.get("roles")) == null) {
            return Set.of();
        }
        return resourceRoles.stream()
                .map(role -> new SimpleGrantedAuthority("ROLE_" + role))
                .collect(Collectors.toSet());
    }
}
JwtConverter decodes JWTs from Keycloak, enabling role-based endpoint access and user information extraction in Spring Security. It implements the Converter interface, extracting roles and details from JWTs, including resource-specific roles. Configurable via JwtConverterProperties, it plays a dual role: access control and JWT deciphering.
And the SecurityConfig class(for more info about new spring security you can follow this link):
@RequiredArgsConstructor
@Configuration
@EnableWebSecurity
public class SecurityConfig {

    public static final String ADMIN = "admin";
    public static final String USER = "user";
    private final JwtConverter jwtConverter;
    @Bean
    public SecurityFilterChain securityFilterChain(HttpSecurity http) throws Exception {
        http.authorizeHttpRequests((authz) ->
                authz.requestMatchers(HttpMethod.GET, "/api/hello").permitAll()
                .requestMatchers(HttpMethod.GET, "/api/admin/**").hasRole(ADMIN)
                .requestMatchers(HttpMethod.GET, "/api/user/**").hasRole(USER)
                .requestMatchers(HttpMethod.GET, "/api/admin-and-user/**").hasAnyRole(ADMIN,USER)
                .anyRequest().authenticated());

        http.sessionManagement(sess -> sess.sessionCreationPolicy(
                SessionCreationPolicy.STATELESS));
        http.oauth2ResourceServer(oauth2 -> oauth2.jwt(jwt -> jwt.jwtAuthenticationConverter(jwtConverter)));

        return http.build();
    }
}
Now the project structure looks like the below:

After Spring application configurations, we can now run our project and test it. I use postman to do this:
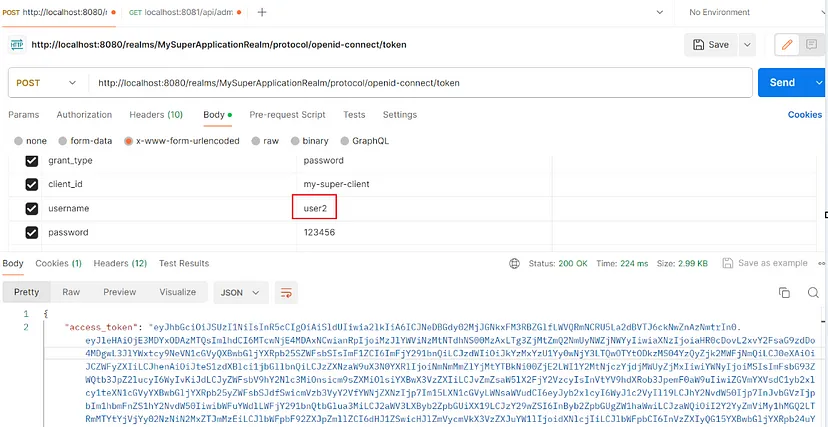
I picked up user2 as the credentials. I get the token I’ve achieved and go to the get request:
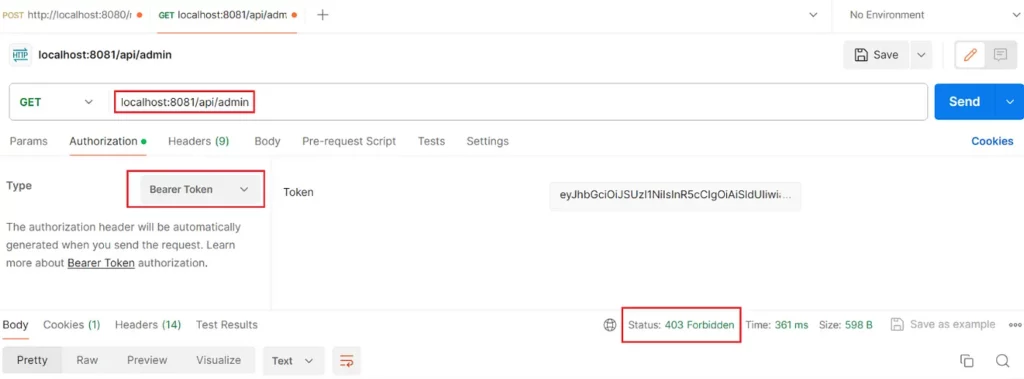
I set up the authorization type to Bareer Token , pasted the token into the token box, and sent a GET request to the admin endpoint. And it got 403 Forbidden. Because user2 has just the user role not admin.
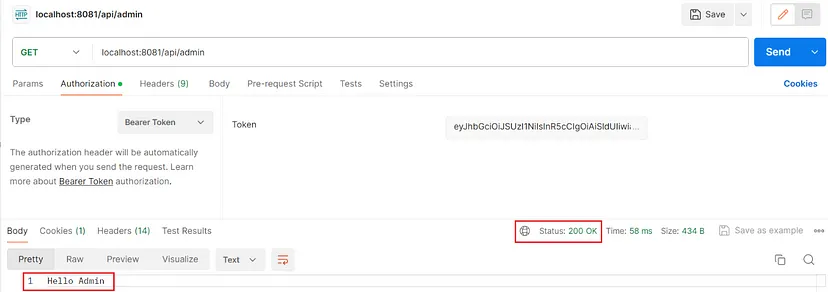
Now I get a token by the credentials of user1as he has the admin role and send a request to the same endpoint. The result:
That’s all!
Conclusion
We set up a Keycloak server using the Docker command. We used the -v flag in this command to store the data, such as realms, clients, and users, credentials on the local machine. We covered the concepts of realms and clients in Keycloak, as well as the types of roles available. Users were created and assigned roles. Subsequently, we developed a Spring Boot RESTful API application and integrated it with our Keycloak server. We secured endpoints using tokens obtained from Keycloak.
You can access the Spring Boot project at this link.
Thank you for your time!