Introduction
The Spring Framework is a very robust framework, released in 2002. Its core features can be applied to plain Java applications or extended to complex, modern web applications.
As it’s constantly being updated and is following new architectural and programming paradigms, it offers support for many other frameworks that work hand-in-hand with it.
With such a vast array of functionalities, it’s only normal that it introduces us to some new annotations, which are a key part of developing Spring applications.
Spring’s configuration is fully customizable, which was originally done through XML configuration files. However, this approach has become outdated, and most people nowadays resort to annotation configuration.
That being said, this series in table content aims to unravel the options you as a developer have to configure and use the Spring framework:
- Spring Framework Annotations: @RequestMapping and its Variants
- Spring Annotations: Core Annotations
- Spring Annotations: Spring Cloud Annotations
- Spring Annotations: Testing Annotations
Note: This article assumes you’re familiar with the Spring Inversion of Control principle.
RequestMapping Annotation
Introduction
If you’ve read anything about Spring, developed a project, or was even remotely interested in how it works, you’ve been introduced to the @RequestMapping annotation.
It’s one of the basic annotations in Spring which maps HTTP requests (URLs) with methods:
@RequestMapping("/")
public void helloWorld() {
    return "Hello World!";
}
It allows us to run methods and pieces of code each time an endpoint is hit by the end-user with an HTTP request. In this case, it’s a simple root mapping that returns the String “Hello World!” when the root endpoint is hit.
The @RequestMapping Annotation
The @RequestMapping annotation itself offers more than shown in the previous example. Let’s briefly cover some of the basic use cases of the annotation.
@RequestMapping Scopes
The mapping can be assigned at a class level or a method level:
@RequestMapping("/admin")
public class AdminController() {
    @RequestMapping("/adminPanel")
    public String adminPanel() {
        return "adminPanel.html";
    }

    @RequestMapping("/statistics")
    public String statistics() {
        return "statistics.html";
    }
}
Here, the /admin mapping is assigned on the class level, whereas the /adminPanel and /statistics mappings are assigned to methods. The class-level mapping will be used as a prefix for all of these method-level mappings: /admin/adminPanel and /admin/statistics.
This way, we can segregate our application into logical parts. For an example, all administrator related logic will be behind the /admin wall, which only administrator users can enter. All non-administrator users will be redirected to the client side of the application.
Multiple Mappings per Method
If need be, we can assign multiple mappings to a single method, such as:
@RequestMapping({"/", "/index", "/home"})
public void helloWorld() {
    return "Hello World!";
}
Hitting any of these endpoints will result in the helloWorld() method handling our request.
Request Methods
The most common attribute used is the method attribute which allows us to specify and narrow down the request method that our method handles (GET, POST, DELETE, etc.) :
@RequestMapping(value = "/addProduct", method = RequestMethod.POST)
public String addProductPost(@ModelAttribute("product") Product product) {
    // some code
}
If we don’t specify a request method, the default request method is GET.
Request Headers
We can further specify the mapping by defining one or more headers. In this case, the helloWorld() method will handle the request if its content-type is text/plain or text/html:
@RequestMapping(value = "/header", headers = {"content-type=text/plain", "content-type=text/html"})
String helloWorld() {
    return "Hello World!";
}
Path Variables
A lot of websites rely on path variables to showcase a specific product, page, profile, etc. to the end-user, such as example.com/viewProduct/324, where 324 is the product ID:
@RequestMapping("/viewProduct/{productId}")
public String viewProduct(@PathVariable int productId, Model model) {
    Product product = productService.getProductById(productId);
    model.addAttribute("product", product);

    return "viewProduct";
}
Here, after the mapping, we encase the path variable with curly brackets ({}) and assign that value to our productId. The @PathVariable annotation takes care of this for us. Then, we can find the product via our ProductService and display it to the end-user.
Of course, the same approach can be used for other variables such as:
@RequestMapping("/users/{username}")
public String viewUser(@PathVariable("username") String username) {
    Profile profile = profileService.getProfileByUsername(username);
    // rest of the code
}
Request Parameters
Very similar to path variables, many applications rely on request parameters to alter the state of the page. We can use the @RequestParam annotation to bind a request parameter to a variable:
@RequestMapping("/login")
public String login(@RequestParam(value = "error", required = false) String error, @RequestParam(value = "logout", required = false) String logout, Model model) {

    if (error != null) {
        model.addAttribute("error", "Wrong username or password!");
    }
    if (logout != null) {
        model.addAttribute("msg", "You have successfully logged out!");
    }
    return "login";
}
Producible and Consumable
Using the @RequestMapping annotation, we can also produce or consume media types. To produce a media type such as “JSON”, you can use the produces attribute alongside the @ResponseBody annotation, whereas to consume a media type you can use the consumes attribute:
@RequestMapping("/annotations")
public class SomeController {
    @RequestMapping(value = "/produce", produces = {"application/json"})
    @ResponseBody
    String produces() {
        return "Here's how you use the 'produces' attribute";
    }

    @RequestMapping(value = "/consume", consumes = {"application/JSON", "application/XML"})
    String consume() {
        return "Here's how you use a 'consume' attribute";
    }
}
Composed @RequestMapping Variants
A single mapping can correspond to different methods if we ensure there’s no ambiguity as to which method should handle which version of the mapping.
We can have multiple methods with the same mapping if their request method is different:
@RequestMapping("/hello")
public String hello() {
    return "hello";
}

@RequestMapping(value = "/hello", method = RequestMethod.POST)
public String helloPost() {
    return "hello post";
}

@RequestMapping(value = "/hello", method = RequestMethod.PUT)
public String helloGet() {
    return "hello put";
}

@RequestMapping(value = "/hello", method = RequestMethod.DELETE)
public String helloDelete() {
    return "hello delete";
}
This same method has 4 different variations:
- Default (GET)
- POST
- PUT
- DELETE
With more variations, the readability of code gets reduced, and this quite honestly is already verbose for a simple mapping. Request mappings in bigger applications can get very complex and convoluted, and we’d want to keep it simpler and more readable.
For this purpose, we’re introduced to several new annotations, the @RequestMapping variants:
@GetMapping@PostMapping@DeleteMapping@PutMapping@PatchMapping
There are quite literally just shortcut versions for the mappings above where @PostMapping("/hello") is equal to @RequestMapping(value="/hello", RequestMethod.POST).
Taking a closer look at how these annotations are defined, we can get a clear idea of what they do:
@Target(ElementType.METHOD)
@Retention(RetentionPolicy.RUNTIME)
@Documented
@RequestMapping(method = RequestMethod.GET)
public @interface GetMapping {

    @AliasFor(annotation = RequestMapping.class)
    String name() default "";

    @AliasFor(annotation = RequestMapping.class)
    String[] value() default {};

    @AliasFor(annotation = RequestMapping.class)
    String[] path() default {};

    @AliasFor(annotation = RequestMapping.class)
    String[] params() default {};

    @AliasFor(annotation = RequestMapping.class)
    String[] headers() default {};

    @AliasFor(annotation = RequestMapping.class)
    String[] produces() default {};
}
That being said, we can rewrite the examples above:
@GetMapping
public String hello() {
    return "hello";
}

@PostMapping
public String helloPost() {
    return "hello post";
}

@PutMapping
public String helloGet() {
    return "hello put";
}

@DeleteMapping
public String helloDelete() {
    return "hello delete";
}
As this is both a simpler, more readable and newer way of writing annotations, it’s generally preferred to write them like this. If need be, you can still define any other attributes such as the value, params, path, etc.
Conclusion
@RequestMapping is a quintessential annotation in the Spring framework which allows us to map HTTP requests with methods we’d wish to run.
As of Spring 4.3, it’s preferred and advised to use the shortcuts made for this annotation for a more readable and less verbose codebase.
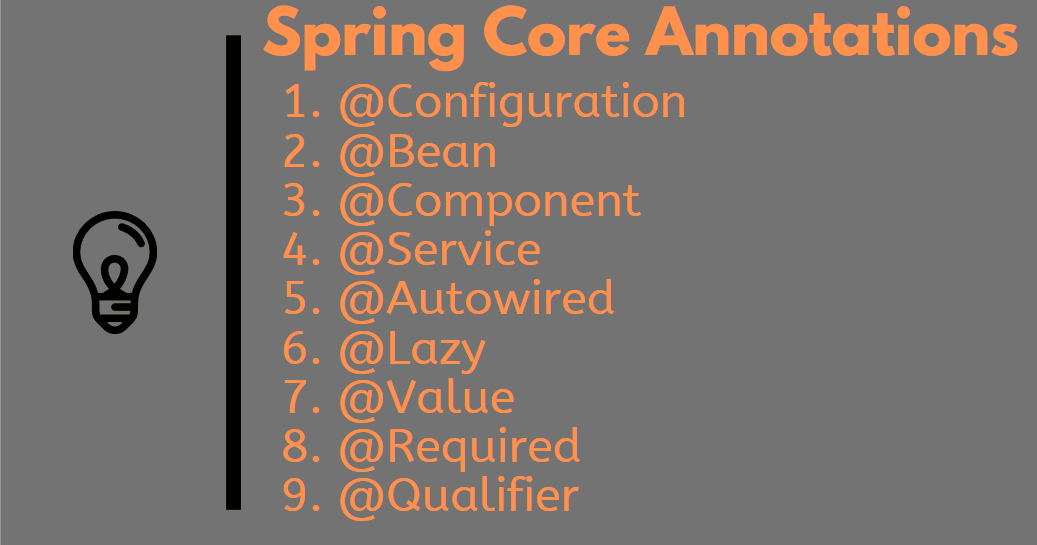
Core Framework Annotations
Let’s take a look at the core annotations that make up almost all Spring applications:
@Bean
A @Bean is a backbone object in the Spring Framework. It all comes down back to JavaBeans – classes that encapsulate objects into a single one. They are a type of POJO (Plain Old Java Object).
All JavaBeans must be Serializable, all fields should be private, all fields must have setters and getters, there should be a no-arg constructor, and fields are accessed exclusively by the constructor or the getter/setter methods:
public class Developer implements java.io.Serializable {
   private int id;
   private String name;

   public Developer() {}
   public void setId(int id) {this.id = id;}
   public int getId() {return id;}
   public void setName(String name) {this.name = name;}
   public String getName() {return name;}
}
In terms of Spring – beans are instantiated and managed by the Spring IoC Container. They are simply object instances managed by Spring.
In order to let Spring know which object instances it should manage, we simply mark the methods in which we instantiate them with the @Bean annotation.
When this method is encountered, it’ll be executed and the returned value will be saved within a BeanFactory:
@Configuration
public class ConfigurationClass {
    @Bean
    public Developer developer() {
        return new Developer();
    }
}
This is the same as using the old XML approach to register a bean:
<beans>
    <bean name="developer" class="com.stackabuse.Developer"/>
</beans>
Now, to inject this bean as a dependency into another bean, we simply have another bean call the developer bean’s method:
@Configuration
public class ConfigurationClass() {

    @Bean
    public Manager manager() {
        return new Manager(developer());
    }

    @Bean
    public Developer developer() {
        return new Developer();
    }
}
@Required
The @Required annotation is used on setter methods and constructors. As the name suggests, it tells Spring that these fields are required in order for the bean to initialize properly.
If the fields aren’t populated at the time of configuration, the bean will fail to initialize, resulting in an exception and the application will fail to build:
public class Developer implements java.io.Serializable {
    private int id;
    private String name;

    public Developer() {}

    @Required
    public void setId(int id) {
        this.id = id;
    }

    public int getId() {
        return id;
    }

    @Required
    public void setName(String name) {
        this.name = name;
    }

    public String getName() {
        return name;
    }
}
To populate a field on configuration time like this, we assign the property names through XML:
<bean class="com.stackabuse.Developer">
    <property name="name" value="David"/>
</bean>
@Autowired
The @Autowired annotation is used for further control over dependency injection. It’s used to wire a bean to another one without instantiating the former one.
Again, instead of wiring dependencies through XML, which was cumbersome, we simply mark our dependencies as @Autowired. Based on our base class, where all of our components are located, Spring does all of the wiring for us.
To declare the base package of our components, we can simply add a tag to our application context file:
<context:component-scan base-package="com.stackabuse.basePackage"/>
All @Component tagged classes (including the derivatives such as @Service, @Controller, and @Repository) will be registered as beans are eligible for autowiring.
@Autowired on Properties
Instead of the explicit, imperative instantiation:
public class ProductController {
    private ProductService productService = new ProductService();

    public void someMethod() {
        List<Product> productList = productService.getProductList();
    }
}
We use a declarative approach:
public class ProductController {

    @Autowired
    private ProductService productService;

    public void someMethod() {
        List<Product> productList = productService.getProductList();
    }
}
In this implementation, we never really instantiate the ProductService class, decoupling it from the ProductController if we wish to test it.
Of course, to autowire a field, it needs to be registered as a bean in the Spring IoC Container. In our case, it’s a @Service annotated bean, but more on that later.
There are also other use-cases for the @Autowired annotation.
@Autowired on Setters
Very similar to the @Required annotation, we can also use @Autowired on setters:
public class ProductController {

    private ProductService productService;

    @Autowired
    public void setProductService(ProductService productService) {
        this.productService = productService;
    }
}
By autowiring a setter like this, there’s no need to populate it through XML.
This is the so-called setter-based dependency injection.
@Autowired on Constructors
The @Autowired annotation can also be used on constructors:
public class ProductService {

    private ProductDao productDao;

    @Autowired
    public ProductService(ProductDao productDao) {
        this.productDao = productDao;
    }
}
This is the so-called constructor-based dependency injection.
The required Flag
By marking a bean as @Autowired, Spring expects it to be available when constructing the other dependencies. If not, we’ll be greeted with an exception and a failed build.
If you can’t guarantee that the bean will be available, or if it’s not always needed, you can use the required flag to mark it as optional:
public class ProductController {

    @Autowired(required = false)
    private ProductService productService;
}
This way, if the product service bean isn’t available, everything will run smoothly.
@Qualifier
The @Qualifier annotation is used to clear up cases where we’d like to autowire more than one bean of the same type.
For an example, in a company, we’ll most likely have more than one employee, and each employee has their respective position – developer, lead developer, manager, CEO, etc…
@Component
public class Developer implements Employee {}

@Component
public class Manager implements Employee {}
If we were to autowire an employee, it would be ambiguous as to which bean we want to autowire:
@Controller
public class CompanyController {
    @Autowired
    private Employee employee;
}
We’d be greeted with an error:
org.springframework.beans.factory.NoSuchBeanDefinitionException:
    No unique bean of type [com.stackabuse.employee] is defined:
        expected single matching bean but found 2: [developer, manager]
To avoid such a situation, we add qualifiers:
@Component
@Qualifier("developer")
public class Developer implements Employee {}

@Component
@Qualifier("manager")
public class Manager implements Employee {}
And when autowiring:
@Controller
public class CompanyController {
    @Autowired
    @Qualifier("developer")
    private Employee employee;
}
This clears up as to which bean we’d like to autowire and the code runs just fine.
@ComponentScan
A crucial annotation for Spring is the @ComponentScan annotation. It specifies which packages contain classes that are annotated. That way, Spring knows which classes it needs to manage and it’s always used alongside the @Configuration annotation.
For example, we have a com.stackabuse.controller package that contains all of our controllers where each class is annotated with @Controller. In order for Spring to know that this package contains components that need management, we use the @ComponentScan annotation and add the package.
Otherwise, we’d have to register every single bean individually, which would be cumbersome and impossible to scale.
In a lot of cases, we simply define a single basePackage that contains all of our components, such as com.stackabuse. Though in some cases we’d want to include multiple basePackages or basePackageClasses:
@Configuration
@ComponentScan(basePackage = "com.stackabuse")
public class SomeApplication {
    // some code
}
If we’d like to define multiple base packages:
@Configuration
@ComponentScan(basePackage = {"com.package1", "com.package2})
public class SomeApplication {
    // some code
}
A type-safe alternative for basePackages is basePackageClasses:
@Configuration
@ComponentScan(basePackageClasses =  Developer.class)
public class SomeApplication {
    // some code
}
Note: If no base package is defined at all, the package that the class is located in will be used as the base package.
@Lazy
By default,, beans and components get initialized eagerly. If we’d like to change that behavior, we’re free to do so using the @Lazy annotation.
It can either be used on a class-level that’s annotated as a @Component or on a method-level that’s annotated as a @Bean.
If annotated, the component/bean will not be initialized until another bean explicitly references it and it’s needed for the application to run smoothly:
@Lazy
@Bean
class SomeResource {}
We could also mark a @Configuration class as @Lazy:
@Lazy
@Configuration
public class AppConfig {
    // some code
}
In this case, all of the beans defined within AppConfig will also be lazily initialized.
@Configuration
The @Configuration annotation is on a class-level and tells Spring that this class contains one or more @Bean methods and may be processed by the Spring container to generate bean definitions.
This is one of the reasons why developers were able to stop using XML-based configuration and the simplicity of the annotation makes Java-based configuration preferable.
@Configuration
public class AppConfig {
     @Bean
     public SomeBean someBean() {
         // Instantiation, configuration, returning the bean
}
@Value
The @Value annotation has quite a few use-cases in Spring and warrants an article for itself. I’ll try to be brief and cover the most common and obvious use cases in this one.
It can be used for:
- Assigning default values to fields
- Reading environment variables
- Using Spring Expression Language (SpEL) Expressions
- Default values for parameters if used within a method/constructor
That being said, let’s go over all of these use-cases one by one.
Default Field Values
If you’d like to assign a default value to a field, the @Value annotation is pretty straightforward:
@Value("Hello World!")
private String helloString;
Even though we didn’t instantiate this String nor assign it a value explicitly, we’ve done so through the annotation.
The @Value annotation is meant to be used with Strings. If you try to apply it to another type, it’ll work only if Spring can easily convert between the two – such as booleans and ints:
@Value("true")
private boolean accepted;

@Value("53")
private int userId;
Reading Environment Properties
Let’s say that amongst other properties, our application.properties file contains some environment variables:
sa.website_name = Stack Abuse
For an example, let’s read this property and assign it to a String in our configuration class. To do this, we need to define the property source as well:
@PropertySource("classpath:application.properties")
@Configuration
public class AppConfig {
    @Value("${sa.website_name}")
    private String websiteName;
}
Generally speaking, the ${...} is used as a property placeholder in Spring. You’re probably already familiar with this if you’ve dabbled in Spring technologies.
If the property isn’t available or defined, we could run into a problem. In this case, we can define default values for placeholders in case they’re not properly defined:
@PropertySource("classpath:application.properties")
@Configuration
public class AppConfig {
    @Value("${sa.website_name}:Backup Value")
    private String websiteName;
}
This way, if sa.website_name doesn’t exist, the value assigned to the String will be Backup Value.
Using SpEL
Similar to the placeholder syntax, Spring Expression Language (SpEL) uses the #{...} syntax for storing expressions:
@Value("#{systemProperties['java.home']}")
private String someValue;
If we decide to throw in some properties that might not be available, then again we’d be in a problem. To avoid such cases, we can also define default “backup” values for SpELs:
@Value("#{systemProperties['unknownproperty'] ?: 'Backup Value'}")
private String someValue;
Default Parameter Values
If applied to a method, the @Value annotation will assign the default value to all parameters of the method:
@Value("Hello")
public String hello(String str1, String str2) {
    return str1 + str2;
}
This method would print:
HelloHello
On the other hand, if we apply the @Value method to both a method and a parameter, the parameter will be assigned the new value:
@Value("Hello")
public String hello(String str1, @Value("World") String str2) {
    return str1 + str2;
}
The output in this case would be:
HelloWorld
@DependsOn
If a bean depends on some other beans for correct instantiation, Spring can guarantee that all the beans it depends on will be created before it. However, we need to specify which ones using the @DependsOn annotation.
The annotation accepts an array of Strings which correspond to the names of the beans in question. This means that you can pass any valid bean name as the argument, as long as it’s properly annotated with a @Component or @Bean annotation.
@Configuration
public class AppConfig {
    @Bean("firstBean")
    @DependsOn(value = {"secondBean", "thirdBean"})
    public FirstBean firstBean() {
        return new FirstBean();
    }

    @Bean("secondBean")
    public SecondBean secondBean() {
        return new SecondBean();
    }

    @Bean("thirdBean")
    public ThirdBean thirdBean() {
        return new ThirdBean();
    }
}
Even though FirstBean is located before the second and third one, we’ve annotated that it depends on the creation of the SecondBean and ThirdBean to work properly. By doing this, Spring will first define those two and then FirstBean.
@Primary
The @Primary annotation is often used alongside the Qualifier annotation. It’s used to define the “default” bean for autowiring when no further information is available.
It gives precedence to the annotated bean, if there are more than one beans of the same type, as the name implies:
@Component
@Qualifier("developer")
@Primary
public class Developer implements Employee {}

@Component
@Qualifier("manager")
public class Manager implements Employee {}
This is the same problem we encountered in the earlier part of the article where we defined a qualifier to allow the @Autowired annotation to choose between the qualified beans.
However, this time, we don’t need to add the @Qualifier annotation to the @Autowired annotation as the primary/default bean has been declared:
@Controller
public class CompanyController {
    @Autowired
    private Employee employee;
}
This will instantiate a Developer bean.
@Scope
The @Scope annotation is applied on bean-level and defines its visibility/life cycle. If applied alongside the @Component annotation, it defines the scope for the instances of the annotated type. If used on a @Bean method, the scope applies to the returned instance.
There are two basic scopes, with another four for web-aware applications:
- singleton
- prototype
- request
- session
- application
- websocket
Singleton Scope
If no other scope name is used, the default value is singleton. A singleton scope warrants only one instance of the annotated method’s returned instance. The object will be saved in the Spring container and cached allowing it to be used anywhere from the application:
@Bean
@Scope("singleton")
public CompanyCEO companyCEO() {
    return new CompanyCEO();
}
Prototype
The opposite of the singleton scope, applying the prototype scope warrants a new instance of the annotated bean every single time we request it.
@Bean
@Scope("prototype")
public Developer developer() {
    return new Developer();
}
Request
The request scope warrants the instantiation of a single bean for each HTTP request:
// This method will be called on every HTTP request
@Bean
@Scope("request", proxyMode = ScopedProxyMode.TARGET_CLASS)
public SetupClass someSetup() {
    // Run some setup on each http request
}
An alternative would be to use the 4.3 annotation @RequestScope which includes the proxy by default.
Session
Very similar to the request scope, the session scope will instantiate the annotated bean with a lifecycle-dependent of the HTTP session.
// This method will be called on every HTTP session
@Bean
@Scope("session", proxyMode = ScopedProxyMode.TARGET_CLASS)
public SetupClass someSetup() {
    // Run some setup on each http session
}
Application
The application scope works similarly to the singleton scope. An application scoped bean’s life cycle depends on the application, or rather, the ServletContext.
The main difference between those two is the fact that application has a wider scope in the sense that it can expand to other applications running on the same ServletContext.
@Scope("application")
@Component
public class Application {}
Again, as of 4.3, you can replace this annotation with @ApplicationScope.
WebSocket
If we use the websocket scope, we tie our bean’s life cycle to the life cycle of the WebSocket‘s session.
The first time it’s called, the bean is instantiated and stored for further use within the same session:
// This method will be called on every websocket session
@Bean
@Scope("websocket", proxyMode = ScopedProxyMode.TARGET_CLASS)
public SetupClass someSetup() {
    // Run some setup on each websocket session
}
Conclusion
The Spring framework is a powerful and robust framework which really changed the game when it comes to developing web-applications. Amongst it’s myriad of projects, it’s a good idea to start with the core framework and build upon that.
The core framework introduces us to various annotations that make our lives easier and more productive. Handling these annotations is a must for every Java/Spring developer.
Spring Cloud Annotations
Spring Cloud is a great extension to the already robust Spring Framework. It allows developers to effortlessly and painlessly build common patterns when it comes to cloud-based architecture such as setting up circuit breakers, discovery clients, routing etc.
We’ve already published several articles covering some of these topics, so if you’d like to see these annotations on practical hands-on examples, these are a great start:
- Spring Cloud: Service Discovery with Eureka
- Spring Cloud: Routing with Zuul and Gateway
- Spring Cloud: Hystrix
- Spring Cloud: Turbine
- Spring Cloud Stream with RabbitMQ: Message-Driven Microservices
@EnableConfigServer
Spring Cloud introduces us to several useful tools, each needing some sort of configuration.
If we’re using multiple tools, it would be logical to store all configuration details in a single place, similar to an application.properties file.
To do this, we annotate a class with the @EnableConfigServer annotation, applied on class-level:
@SpringBootApplication
@EnableConfigServer
public class SomeApplication {
    public static void main(String[] args) {
        SpringApplication.run(SomeApplication.class, args);
    }
}
This annotation tells Spring where to search for configurations and by creating a centralized server configuration like this, other applications can talk to it via it’s port – which by default is 8080.
@EnableEurekaServer
When developing a project with a microservice architecture, especially when there’s numerous services that should be working together, we’re faced with a problem. The way these services talk to each other.
We could hardcode all the names and ports in a property file but this is bad practice and isn’t scalable at all. Even if we did, what happens when there are multiple instances of a service? Which one responds to the request?
To solve these, we can rely on Service Discovery via Eureka.
Very similar to the @EnableConfigServer annotation, we’ll make a Eureka server by annotating a class with @EnableEurekaServer, which can now be used to lookup other services registered to it and manage them:
@SpringBootApplication
@EnableEurekaServer
public class SomeApplication {
    public static void main(String[] args) {
        SpringApplication.run(SomeApplication.class, args);
    }
}
@EnableEurekaClient
A Eureka Server is nothing without its services. Each service that we want to put on the radar for our server should be annotated with the @EnableEurekaClient annotation.
As an alternative, we could use the @EnableDiscoveryClient annotation, which comes from spring-cloud-commons. Though, if you know the specific implementation you’ll be using, it’s better to be specific. If you’re using the more genetic @EnableDiscoveryClient annotation, Spring will choose the implementation based on the .jars present in the classpath.
@SpringBootApplication
@EnableEurekaClient
public class Application {
    public static void main(String[] args) {
        SpringApplication.run(Application.class, args);
        }
}
@EnableDiscoveryClient
The default discovery client annotation which marks a class as a service that should be put on the radar for a server.
@EnableCircuitBreaker
Again, when working with microservices, we’re faced with a big problem. It’s common for services to work with other services to complete certain requests.
Let’s say Service A calls Service B, which relies on Service C to complete a request. Now let’s say Service C completely fails due to a network error or an overload. What happens next is a cascading error in the flow of logic coming back up to Service A.
What we can do to rectify this is implement circuit breakers. Each service should have a circuit breaking point, and if something wrong occurs, they “open their circuits” so that the problem doesn’t transpose onto other services. In this case, the circuit breaker of our choice isolates the failing service so that other services can’t call it and fail as well.
The @EnableCircuitBreaker annotation is applied on class level, for each and every service in our microservice architecture:
@SpringBootApplication
@EnableDiscoveryClient
@EnableCircuitBreaker
public class ServiceA {

    public static void main(String[] args) {
        SpringApplication.run(ServiceA.class, args);
    }
}

@SpringBootApplication
@EnableDiscoveryClient
@EnableCircuitBreaker
public class ServiceB {

    public static void main(String[] args) {
        SpringApplication.run(ServiceB.class, args);
    }
}

@SpringBootApplication
@EnableDiscoveryClient
@EnableCircuitBreaker
public class ServiceC {

    public static void main(String[] args) {
        SpringApplication.run(ServiceC.class, args);
    }
}
The circuit breaker pattern in Spring is implemented through Spring Cloud: Hystrix.
@HystrixCommand
For the circuit breaker pattern to work fully, we can’t only annotate classes. Since in almost all situations we can “expect” that a method may be risky, in the sense that it might fail when called, we mark them with @HystrixCommand. Alongside the annotation, we can also add a flag that points to a different method to run if the original one fails:
@GetMapping(value = "/personalized/{id}")
@HystrixCommand(fallbackMethod = "recommendationFallback")
public Product[] personalized(@PathVariable int id) {
    Product[] result = restTemplate.getForObject("http://recommendation-service/recommendations", Product[].class);
    return result;
}

public Product[] recommendationFallback(int id) {
    System.out.println("=======recommendationFallback=========" + id);
    return new Product[0];
}
@RibbonClient
Ribbon works as a load-balancer on the client side and gives you control over the HTTP and TCP clients.
In most cases, when using a discovery client such as Eureka, you don’t need to use this annotation as it’s applied by default. In the vast majority of cases the default options are good enough to take care of load balancing, but if you require to tweak them, you can do so:
@Configuration
@RibbonClient(name = "custom", configuration = CustomConfiguration.class)
public class SomeConfiguration {

}
The CustomConfiguration class should also be a @Configuration annotated class with the custom Ribbon settings set-up as beans.
@LoadBalanced
The @LoadBalanced annotation is used to mark RestTemplates that should work with the RibbonLoadBalancerClient when interacting with your services:
@RestController
@RibbonClient(name = "custom", configuration = CustomConfiguration.class)
public class SomeApplication {

    @LoadBalanced
    @Bean
    RestTemplate restTemplate(){
        return new RestTemplate();
    }
    // ...
}
This annotation basically allows the RestTemplate to leverage its built-in support for load balancing.
Conclusion
The Spring framework is a powerful and robust framework which really changed the game when it comes to developing web-applications. Amongst it’s myriad of projects, the Spring Cloud module is a great extension of the original framework.
Testing Annotations
Test-Driven Development (TDD) has become an important topic nowadays and it’s considered extremely bad practice not to properly test your applications.
There are several widely-used frameworks that make this job a lot easier for developers, where JUnit is the most commonly used one.
To catch up with modern programming practices, Spring has launched a new starter dependency, spring-boot-starter-test, which comprises of a few frameworks:
- JUnit
- Spring Test & Spring Boot Test
- AssertJ
- Hamcrest
- Mockito
- JSONassert
- JsonPath
In this article, we’ll cover the following test annotations: @BootstrapWith, @ContextConfiguration, @WebAppConfiguration, @ContextHierarchy, @ActiveProfiles, @Rollback, @Commit, @BeforeTransaction, @AfterTransaction, @Sql, @SqlGroup, @SqlConfig. @SpringBootTest, @DataJpaTest, @DataMongoTest, @WebMvcTest, @MockBean, @AutoConfigureMockMvc, @JsonTest, @TestPropertySource, @Timed, @Repeat, @BootstrapWith
The @BootstrapWith annotation is an annotation that you’ll likely very rarely use. The default configurations for the Spring TestContext Framework are more than good enough for most use cases.
If it isn’t, you can change the ContextLoader or implement custom TestContexts amongst a myriad of other configurations you can change.
Again, this is an annotation you likely won’t be using if you’re not a part of a team that really needs custom configuration for the Spring TestContext Framework.
@ContextConfiguration
The @ContextConfiguration an integration test annotation applied at a class-level used to define how Spring should load the ApplicationContext.
This annotation can be applied alongside the @Component (as well as annotations such as @Service, @Repository, etc.) and @Configuration annotations as well as any class that contains @Beans.
You can use the annotation to refer either to XML files or Java classes:
@ContextConfiguration("/some-test-configuration-file.xml")
// @ContetConfiguration(locations = "/some-test-configuration-file.xml")
// You can use the optional `locations` flag as well.
public class ApplicationTests {
    // Testing code...
}
@ContextConfiguration(classes = TestConfiguration.class)
public class ApplicationTests {
    // Testing code...
}
For an example, let’s say we have TestBean:
@Configuration
public class TestBean {

    @Bean
    public DeveloperService developerService() {
        return new DeveloperService();
    }
}
If we wanted to do some asserts on this bean, we’d do something along the lines of:
@ContextConfiguration(classes = TestBean.class)
public class ApplicationTests {
    @Autowired
    private DeveloperService;

    @Test
    public void testBean() {
        Developer dev = developerService.getDeveloperById(5);
        assertEquals("David", dev.getName());
    }
}
Nowadays, it’s preferable to rely on the class approach, as XML is generally considered an outdated approach for registering beans. If you have more than one class, of course, you’d simply specify them via classes = {TestBean.class, TestBean2.class, TestBean3.class}, etc.
This brings us to the @Test annotation, which will be covered in detail in below. For now, let’s simply use it for illustration purposes.
@WebAppConfiguration
If you’d like to ensure that Spring loads a WebApplicationContext for your tests instead of the regular ApplicationContext, you can use the @WebAppConfiguration annotation alongside the @ContextConfiguration annotation:
@ContextConfiguration(classes = TestBean.class)
@WebAppConfiguration
public class ApplicationTests {

    @Autowired
    private DeveloperService;

    // Rest of the code...
}
Alternatively, you can specify the value flag, or rather, the location of the WebApplicationContext, if it’s not located in the default src/main/webapp directory:
@WebAppConfiguration("some/other/location")
public class ApplicationTests {}
@ContextHierarchy
Another annotation that is generally rarely used (I haven’t personally seen anyone use it in a project) is the @ContextHierarchy annotation.
It allows the developer to define multiple @ContextConfigurations in levels via a parent-child relationship.
The idea is that the child contexts can use the beans registered in the parent contexts and this improves the reusability of beans:
@ContextHierarchy({
    @ContextConfiguration(classes = ApplicationTestConfiguration.class),
    @ContextConfiguration(classes = WebApplicationTestConfiguration.class)
})
public class ApplicationTests {

}
If you’d like to read more about this annotation, the documentation contains some in-depth information about context hierarchy.
@ActiveProfiles
The @ActiveProfiles annotation is a pretty straightforward and simple annotation. It defines which profile should be active when loading the context configuration:
@ContextConfiguration
@ActiveProfiles("dev")
public class ApplicationTests {}
This indicates that the “dev” profile should be active.
The name of the annotation implies that we can define multiple profiles, which we can:
@ContextConfiguration
@ActiveProfiles({"dev", "prod"})
public class ApplicationTests {}
If you’d like to read more about Spring Profiles, we’ve got you covered!
@Rollback
Sometimes, when dealing with databases, we want to roll-back the changes we’ve made, especially if we’ve caused an exception.
The @Rollback annotation defines whether the transaction of a method marked with @Transactional should be rolled back, after the test method calling it has completed.
It can be applied to class and method level:
- Class Level: Defines default rollback for all test methods within the class
- Method Level: Defines the rollback for the specific test method
@Rollback(true)
@Test
public void someTest() {
    // ...calling some transactional method
}
After the test is done, all changes made by the transactional method will be rolled back.
An interesting point to make is the fact that you can set the optional flag to false, in which Spring ensures that the changes are not rolled back. Setting the @Rollback annotation to false will behave exactly the same as @Commit.
@Commit
Appending to the previous section, the @Commit annotation is used when we want to assure the changes in the database after running the test methods.
It behaves the same as @Rollback(false) and can be applied to class or method level:
@Commit
@Test
public void someTest() {
    // ...calling some transactional method
}
@BeforeTransaction
Sometimes, we want to run specific code pieces before transactions are made. To do so, we obviously need to define methods specifically written for this.
To invoke them before each transaction, we simply annotate them with the @BeforeTransaction annotation:
@BeforeTransaction
void methodBeforeTransaction() {
    // ...ran before a transaction
}
For the annotation to work properly, you need to mark your transactional methods with @Transactional.
Note: As of Spring 4.3, these methods are not required to be public.
@AfterTransaction
With the same nature as the @BeforeTransaction annotation, the @AfterTransaction annotation runs a certain method after a transaction has been made:
@AfterTransaction
void methodAfterTransaction() {
    // ...ran after a transaction
}
Note: As of Spring 4.3, these methods are not required to be public.
@Sql
Using the @Sql annotation, and passing in the name(s) of the schemas we wish to be executed, we can programmatically (or declaratively) execute SQL scripts.
By default, these scripts are ran before any @Before methods.
If we define a script, such as createTable.sql:
CREATE TABLE ITEM (ITEM_ID INT PRIMARY KEY, ITEM_NAME VARCHAR(256) NOT NULL);
We can reference it and execute it easily:
@Test
@Sql("/createTable.sql")
public void itemTest {
    // ...some code that depends on the sql script above
}
@SqlGroup
The @SqlGroup annotation allows us to bundle together multiple SQL scripts and run them.
If we have another script, such as one for dropping the same table, dropTable.sql:
DROP TABLE ITEM;
We can bundle together the createTable.sql script with the dropTable.sql script to run before and after the test method, for an example:
@Test
@SqlGroup({
    @Sql(executionPhase = ExecutionPhase.BEFORE_TEST_METHOD, scripts = ""),
    @Sql(executionPhase = ExecutionPhase.AFTER_TEST_METHOD, scripts = ""),
})
public void itemTest {
    // ...item table gets created, tested by the code and then dropped
}
@SqlConfig
As the name implies, following the standard Spring annotation examples, the @SqlConfig annotation is used to define the configuration of SQL scripts – how they’re parsed and executed.
It can be applied to class-level or method-level. Integration tests, which require global configuration for all running SQL scripts, typically use the class-level approach whereas the method-level approach is for local configurations of certain methods:
@Test
@Sql(scripts = "/createTable.sql",
    config = @SqlConfig(attribute = "val", attribute2 = "val"))
public void itemTest {
    // Some code...
}
There are 9 attributes you can pass onto the @SqlConfig annotation:
blockCommentEndDelimiter: End delimiter for block commentsblockCommentStartDelimiter: Start delimiter for block commentscommentPrefix: The prefix for single-line commentsdataSource: Name of thedataSourcebeanencoding: Specifying the encoding for the scriptserrorMode: Which mode to use when an error is encounteredseparator: The character that’s used to separate statementstransactionManager: Name of the transaction manager beantransactionMode: Which mode to use when executing SQL scripts
@SpringBootTest
The @SpringBootTest annotation searches for the test class annotated with @SpringBootConfiguration which in most cases is our main application class as @SpringBootApplication includes the previous annotation within itself.
Once found, it constructs the application context for the test environment. You can even start a web environment using the webEnvironment attribute:
@SpringBootTest
public class IntegrationTests {
    // Rest of the code
}

@SpringBootTest(webEnvironment = pringBootTest.WebEnvironment.RANDOM_PORT)
public class WebEnvIntegrationTests {
    // Rest of the code
}
@DataJpaTest
Using the @DataJpaTest annotation, we can test JPA applications. It’s applied on class-level and constructs an application context for all the @Enitity classes, alongside an embedded database which is applied by default.
Note: Regular @Component classes are not loaded in the application context created by the @DataJpaTest annotation.
It’s used alongside the @RunWith(SpringRunner.class) annotation, which indicates which facilities will the marked class use.
By default, all of the JPA transactions will roll back (you can change this behavior by applying either @Rollback(false) or @Commit):
@RunWith(SpringRunner.class)
@DataJpaTest
public class SomeJpaTest {
    // Rest of the code
}
This is a classic JPA test, though, if you’d like to use the real database, instead of the embedded in-memory database provided, you can simply add another annotation to prevent such behavior:
@RunWith(SpringRunner.class)
@DataJpaTest
@AutoConfigureTestDatabase(replace = Replace.NONE)
public class SomeJpaTest {
    // Rest of the code
}
@DataMongoTest
Very similar to the @DataJpaTest annotation, to perform classic MongoDB tests, we apply the @DataMongoTest annotation alongside the @RunWith(SpringRunner.class) annotation.
Keep in mind that this annotation is used when the test it’s applied to only tests MongoDB components and adds only @Document classes to the application context:
@RunWith(SpringRunner.class)
@DataMongoTest
public class SomeMongoTest {
    // Rest of the code
}
Then again, if you’d like to run this with the real database, and not the in-memory embedded database provided by Mongo, you can exclude this option:
@RunWith(SpringRunner.class)
@DataMongoTest(excludeAutoConfiguration = EmbeddedMongoAutoConfiguration.class)
public class SomeMongoTest {
    // Rest of the code
}
@WebMvcTest
Again, very similar to the @DataJpaTest and the @DataMongoTest annotations, to perform classic Spring MVC tests, we apply the @WebMvcTest annotation alongside the @RunWith(SpringRunner.class) annotation.
Keep in mind that the effects of this annotation only apply to the MVC infrastructure. That being said, it doesn’t instantiate the whole context.
The annotation can be used to test a single controller, by passing it as an attribute such as @WebMvcTest(SomeController.class).
To instantiate other needed dependencies, such as services, we typically use the @MockBean annotation. @WebMvcTest configures MockMvc which can be used to easily and quickly test MVC controllers and instantiate other collaborators:
@RunWith(SpringRunner.class)
@WebMvcTest(HomeController.class)
public class ControllerTests {

    // Auto-configured to make mocking easier
    @Autowired
    private MockMvc mockMvc;

    @MockBean
    private SomeBean someBean;

    @Test
    public void someTest() {
        // Test logic
    }
}
@MockBean
When testing specific units, such as say, a controller, we want to isolate them as much as we can. Since most Spring Application components rely on a bunch of other components (dependencies), it’s quintessential to make sure these components are all individually testable.
To successfully isolate the objects we want to test, while still allowing the application to work fine, we mock or simulate the dependencies. A @MockBean annotation is used when we want to mock a dependency in an application:
@RunWith(SpringRunner.class)
@WebMvcTest(HomeController.class)
public class ControllerTests {

    // Auto-configured to make mocking easier
    @Autowired
    private MockMvc mockMvc;

    @MockBean
    private SomeBean someBean;

    @Test
    public void someTest() {
        // Test logic
    }
}
In this example, the someBean dependency is simulating an actual dependency. If the bean exists in the context, the mock replaces it. If it doesn’t exist, the mock is added to the context as a bean.
Note: There’s a difference between the @Mock and @MockBean annotations. The @Mock annotation comes from the Mockito library, and is equivalent to calling the Mockito.mock() method. On the other hand, @MockBean is the Spring library wrapper of the @Mock annotation.
@AutoConfigureMockMvc
As the name suggests, the @AutoConfigureMockMvc annotation, when applied to a test class, will auto-configure MockMvc, the same way @WebMvcTest auto-configures it.
@RunWith(SpringRunner.class)
@SpringBootTest
@AutoConfigureMockMvc
public class ControllerTests {

    @Autowired
    private MockMvc mockMvc;

    // Rest of the logic
}
If you want to focus only on the web layer, consider using the @WebMvcTest annotation instead.
@JsonTest
A lot of applications are dealing with JSON serialization/deserialization. Therefore it makes a lot of sense to make sure it’s working properly while testing the application. By using the @JsonTest annotation, Spring auto-configures the supported JSON mapper (Jackson, Gson or Jsonb).
It’s typically used alongside the @RunWith(SpringRunner.class) and is used for classic JSON tests, scanning for @JsonComponents.
@RunWith(SpringRunner.class)
@JsonTest
public class JsonTests {
    @Test
    public void someJsonTest() {
        // Rest of the logic
    }
}
@TestPropertySource
The @TestPropertySource annotation is applied to class-level, and defines the locations to the property sources that we want to use for the test.
These properties are saved as a set of @PropertySources in the application context’s environment. These properties have a priority over the system or application properties.
Essentially, when we wish to override the system/application properties with specific properties for our tests, we simply annotate the test class:
@RunWith(SpringRunner.class)
@ContextConfiguration(classes = TestConfiguration.class)
@TestPropertySource("classpath:applicationtest.properties")
public class ApplicationTest {
    // Rest of the logic
}
On the other hand, you can specify inline properties, instead of the whole properties file:
@RunWith(SpringRunner.class)
@ContextConfiguration(classes = TestConfiguration.class)
@TestPropertySource(properties = {"sa.website_name = stackabuse", "sa.website_url = www.stackabuse.com"})
public class ApplicationTest {
    // Rest of the logic
}
@Timed
The @Timed annotation defines the time in milliseconds in which the test method has to finish execution, otherwise it’ll fail:
@Timed(millis = 1000)
public void testMethod() {
    // Some test logic
}
If the test takes more than a second to execute, it’ll fail. This includes all repetitions of the method, if the @Repeat annotation is present.
@Repeat
The @Repeat annotation defines how many times a test method should be repeated:
@Repeat(5)
@Test
public void testMethod() {
    // Some test logic
}
This test will be repeated five times.
Conclusion
The Spring framework is a powerful and robust framework which really changed the game when it comes to developing web-applications. Amongst all of the things it supports, it offers great TDD support for Spring Applications and allows developers to easily and quickly set up any kind of tests.